HubSpot Getting Started Template
Customize this template on how to get started in HubSpot to maximize the productivity of your go-to-market teams.
What is HubSpot?
HubSpot is an inbound marketing, sales, and CRM platform. It aids businesses in customer acquisition, engagement, and retention.
Features include the Marketing Hub for campaigns and analytics, the Sales Hub for sales process management, the Service Hub for customer support, a CRM, CMS for websites, automation, and robust analytics.
HubSpot is user-friendly and suitable for various business sizes. It emphasizes inbound marketing by creating valuable content to attract customers.
Learn how to 3x revenue growth by combining the power of Spekit and HubSpot.
How to log in to HubSpot
There are multiple ways to log in to HubSpot:
- Enter an email address and password
- Sign in with Google
- Use single sign-on if you have an Enterprise account.
- If SSO is turned on, you will be signed out of HubSpot after 24 hours of inactivity.
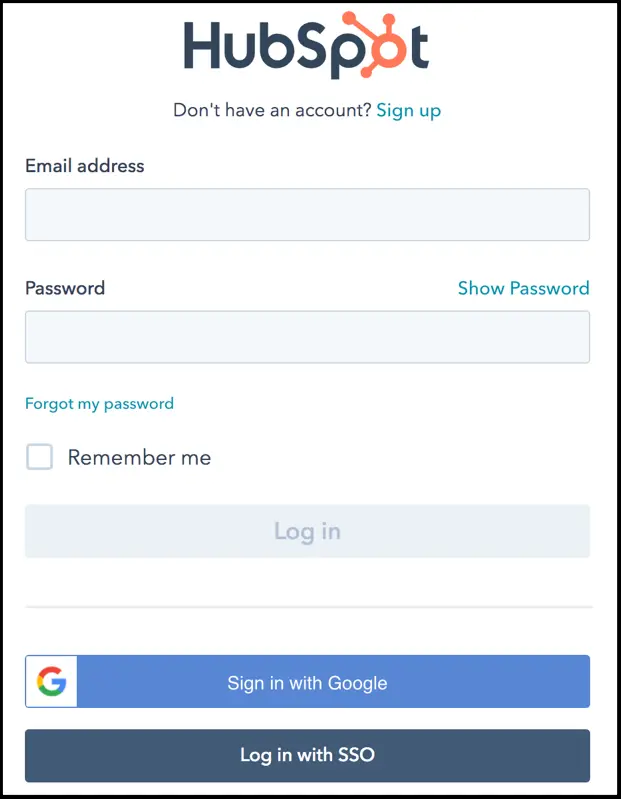
➡️ If you are looking for the HubSpot login page, click here.
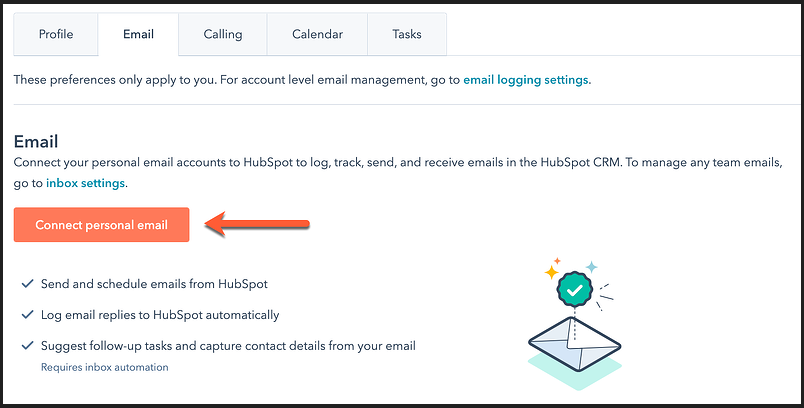
How to connect your personal email to HubSpot
You can connect your personal email in your account settings.
- In your HubSpot account, click the settings settings icon in the main navigation bar.
- In the left sidebar menu, navigate to General.
- Click the Email tab.
- Click Connect personal email.
- If you want to turn on inbox automation features when you connect, in the dialog box, select the Turn on inbox automation checkbox.
- Click Connect your inbox.
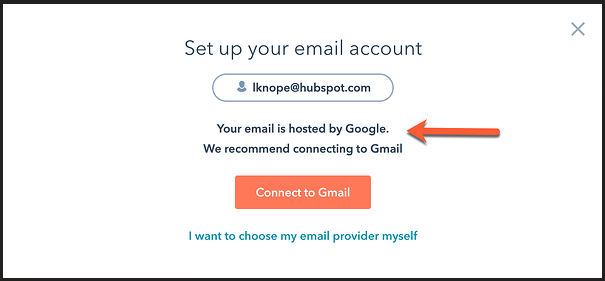
- In the text field, enter your email address.
- HubSpot will attempt to recommend which email provider you should connect with. Click Connect to [recommended provider], then continue the steps below for your specific provider to finish connecting your personal email.
How to set up user notifications in HubSpot
User notifications alert you when various actions or activities occur in your account.
- You can set up and control the notifications you receive from HubSpot.
- Super admins in Enterprise accounts can set default notification preferences for other users.
- If default notifications are set up, preferences set by individual users will take precedence over the defaults.
To set up your HubSpot notifications:
- In your HubSpot account, click the settings settings icon in the main navigation bar.
- In the left sidebar menu, navigate to Notifications.
- Click the Email, Desktop, Other apps and Mobile app tabs to set the type of notifications you would like to receive.
- To turn on a notification, search for or expand the notification topics and select the notification checkbox. To clear all notifications, select Clear all preferences at the top of the What you get notified about section.
How to create companies in HubSpot?
Create and manage organization records effortlessly in HubSpot.
- These records centralize organization details for your team’s reference and real-time updates across your HubSpot account.
- After forming an organization record, establish connections with other records like contacts, deals, and tickets.
- This linkage facilitates tracking relationships and syncing pertinent activities seamlessly.
To manually generate organizations:
- Go to Contacts > Companies in your HubSpot account.
- Click Create company in the upper right.
- Input company properties in the right panel. Additional fields appear after entering the company name/domain. Modify visible properties via Edit this form.
- In Associate company with, link to related records. Customize associations using Edit this form.
- Complete company info and click Create. For more, use Create and add another.
Other methods to create companies in HubSpot include:
- Importing existing companies from another CRM.
- Importing Salesforce accounts as companies through the Salesforce integration.
- HubSpot’s automatic creation of companies based on contacts’ email addresses and subsequent association of records.
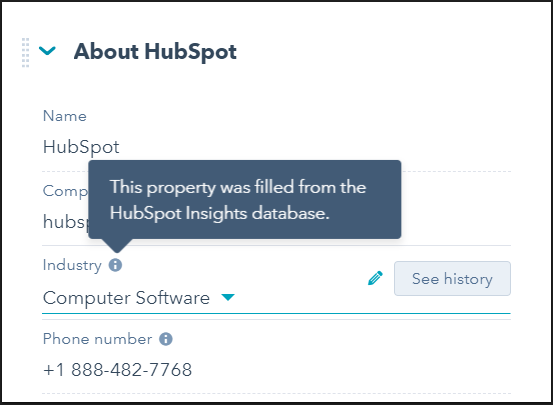
HubSpot insights on company information
HubSpot Insights compiles company data through a blend of third-party sources, web crawling, and crowdsourcing, keeping it continuously up-to-date.
When enabled, here’s what to anticipate:
- Creating a company with a domain triggers HubSpot Insights to refresh its data for that company, though discrepancies may arise from various data origins.
- Insights can populate company info when a domain-linked activity occurs, like a form submission with an email domain (e.g., example@hubspot.com).
- Property values initially added by HubSpot Insights can evolve over time, but your manually-entered values stay intact. Some values enhance the database. Opting out of changes is possible.
- Companies originating from free email domains (e.g., gmail.com) might not auto-fill with Insights; manual creation ensures Insight-driven value integration.
Properties that HubSpot Insights populates:
HubSpot Insights attempts to pull data into the following default company properties:
- Annual revenue
- City
- Country
- Description
- Facebook company page
- Industry
- Is public
- LinkedIn bio
- LinkedIn company page
- Name
- Number of employees
- Phone number
- Postal code
- State/Region
- Street address
- Street address 2
- Time zone
- Total money raised
- Twitter handle
- Web Technologies
- Website URL
- Year founded
How to create contacts in HubSpot
Any person interacting with your business can be saved as a contact in HubSpot. Examples of contacts include visitors who convert on a form, visitors who contact your chat team, or potential customers that your team met during an event.
📝 NOTE: You can create individual contacts from the contacts index page, or create contacts through other HubSpot tools.
To manually create a contact:
- In your HubSpot account, navigate to Contacts > Contacts.
- In the upper right, click Create contact.
- In the right panel, enter the properties of the contact. Once you’ve filled in the contact’s name and/or email, additional fields will appear.
• Optional: To customize the properties that appear, click Edit this form at the top.
📝 NOTE: It is not recommended to add contacts to the CRM without an email address because HubSpot uses the email address to deduplicate contacts and automatically associate contacts with companies.
- In the Associate contact with section, search for and select records the contact is related to.
• Optional: To customize the associations that appear, click Edit this form at the top. - If you’ve turned on GDPR functionality in your account, select options that indicate the legal basis for processing the contact’s data.
- If your account has marketing contacts, select the Set this contact as a marketing contact checkbox to set the contact as Marketing.
• If you don’t select this while creating the contact, you can set the contact as marketing later. - Once you’re done, click Create contact.
- To save then create another contact, click Create and add another.
There are additional ways to create contacts in HubSpot:
- If you’re moving from another CRM with existing contacts or have contact data in a spreadsheet, you can import contacts to HubSpot.
- When a new visitor fills in and submits a HubSpot form, a contact record for their email address will be created in HubSpot automatically.
- You can create a contact manually or automatically through the conversations tool.
- When a user sends a tracked and logged email to a prospect, a contact is created automatically.
How to create and edit properties in HubSpot
Properties are data fields within HubSpot records used to store information. For instance, the City company property designates a company’s location. While default properties are provided for each object, custom properties can be crafted for distinct business data.
Before crafting a custom property, assess whether a default one meets your data needs. You can manage properties through cloning, deletion, and exportation in settings.
To create and edit properties:
- Access your HubSpot account and click the settings icon in the main navigation bar.
- In the left sidebar, navigate to Properties.
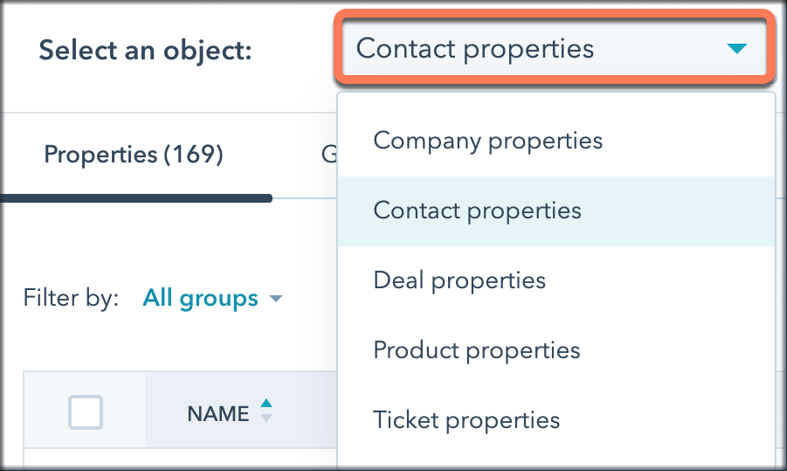
- Use the Select an object dropdown to choose an object, then create or edit a property for it.
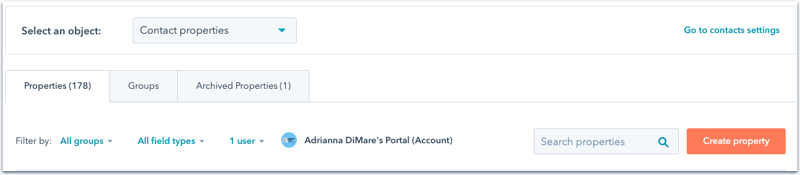
To find specific properties:
- Use the upper left dropdowns to filter by property group, field type, or creator.
- In the upper right, search for a property by name.
- Click a column header to sort properties.
To create or edit a property:
- To create, click Create property; to edit, click a property’s name in the table.
📝 NOTE: Some properties can’t be edited if they’re default or in use in tools like lists or workflows.
🔔 Remember: Creating/editing requires Edit property settings permissions. The number of custom properties hinges on your subscription. If you downgrade, you can edit existing properties but can’t create new ones if you exceed the limit.
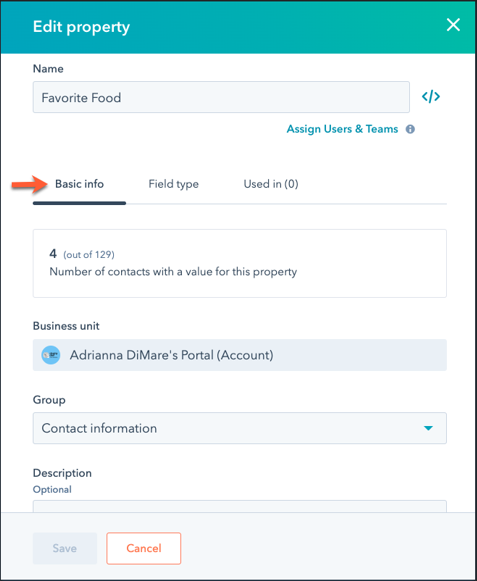
In the right panel, set or change basic information:
- Object type: Choose the object storing the property.
- Group: Assign a property group for grouping similar properties.
- Label/Name: Unique name for the property in HubSpot CRM.
- Internal name: Unchangeable internal name for integrations.
- Description: Optional property explanation.
- For new properties, click Next.
- For edits, go to the Field type tab.
To manage options:
(for multiple checkboxes, dropdown selects, radio selects)
- Label: Option name; internal value auto-generated.
- In forms: Toggle on for form inclusion.
- Add an option: Create a new option.
- Load options: Load multiple options.
- Clear all: Remove all options.
For bulk edits, select options, then:
- Hide in forms: Hide property values in forms.
- Merge: Merge values, affecting integrations.
- Delete: Delete selected values.
- Reorder: Drag to reorder or use Sort dropdown.
For new properties, click Next; for edits, go to the Rules tab.
Set/edit rules:
- Hide from forms, pop-ups, and bots: Exclude from options.
- Unique values: No repeat values.
- Show in search (Enterprise): Searchable value.
- Validation rules: Configure rules.
Finish by clicking Create or Save.
How to create deals in HubSpot
Utilize HubSpot’s deals feature to track potential revenue in your sales process.
- Deals can be associated with other records like contacts and companies involved in the deal, allowing HubSpot to link relevant activities to the deal record.
- Customize deal creation by configuring properties and default close dates.
Manual Creation from Deals Index Page
- Go to Sales>Deals in your HubSpot account.
- Click Create deal in the upper right corner.
- Enter deal details in the right panel.
- Associate records or line items related to the deal.
- Click Create deal or Create and add another.
Creating a Deal on a Record
- In the record’s right panel, under the Deals section, click + Add.
- Enter new deal details in the Associate new tab (default association to the record).
- Click Create or Create and add another for additional deals.
Creating a Deal from Gmail or Outlook
- Install the HubSpot Sales Chrome extension, Office 365 add-in, or Outlook desktop add-in.
- Create deals for contacts within your inbox.
Creating a Deal Using a Workflow
Depending on your subscription:
- Use the Create a deal action in workflows to trigger deal creation based on conditions. For instance, if a contact reaches a score threshold, a deal can be automatically created and assigned.
HubSpot’s deals feature streamlines revenue tracking and support automation for efficient deal management.
How to manage deal settings in HubSpot
Adjust Default Close Date for New Deals:
By default, a deal’s closing date is the last day of the month it’s created. However, you can establish a default close date for new deals.
📝 NOTE: These default close date settings aren’t applicable to deals made through the mobile app, imports, or workflows. For workflows, a default close date can be set using the Create record workflow action. If no date is set, the deal’s close date will be blank upon creation.
To set a default close date for newly created deals in the desktop app:
- In your HubSpot account, click the settings icon in the main navigation bar.
- Go to Objects > Deals in the left sidebar menu.
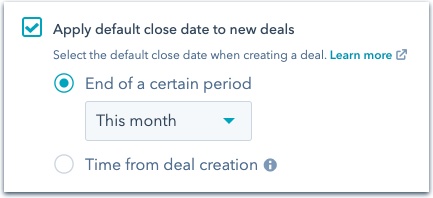
- The Apply default close date to new deals option is preselected. To modify the close date:
• Choose End of a certain period for a predefined rolling date.
• Select This month or Next month from the dropdown.
• Select Time from deal creation for a custom rolling date based on deal creation time.
• Enter a number and choose a time frame from the dropdown. - To exclude a default close date, uncheck the Apply default close date to the new deals box. This means newly created deals won’t have a default close date.
HubSpot also automatically sets or updates a deal’s close date when:
- A user creates an open deal without manually choosing a close date.
- A user moves a deal between closed-won or closed-lost stages.
Set Default Deal Amount:
Determine how deal value is calculated when associating line items with deal records.
- In your HubSpot account, click the settings icon in the main navigation bar.
- Navigate to Objects > Deals in the left sidebar menu.
- On the Setup tab, select the default deal amount to display on the deal record when adding line items.
- Total Contract Value (TCV): Total deal value based on line items, including recurring and one-time charges. Amount property value isn’t considered.
- Annual Contract Value (ACV): Deal value spread over 12 months.
- Annual Recurring Revenue (ARR): Total annual revenue based on term length and recurring line items. Assumes 12 months if no term length. Amount property value isn’t considered.
- Monthly Recurring Revenue (MRR): Monthly recurring revenue calculated from line item values and term length. Amount property value isn’t considered.
- Manual Entry: Deal amount doesn’t change with line item adjustments. Manual update needed.
Your changes are saved automatically, and the chosen deal value will be displayed.
How to create tasks in HubSpot
Effectively handle your to-do list with HubSpot’s task management features. These tasks serve as reminders linked to specific records, with the option for Sales Hub or Service Hub users to set up recurring tasks.
Plan tasks based on schedule, historical performance, or automate them using deal stages. After task creation, explore task editing, completion, and deletion methods.
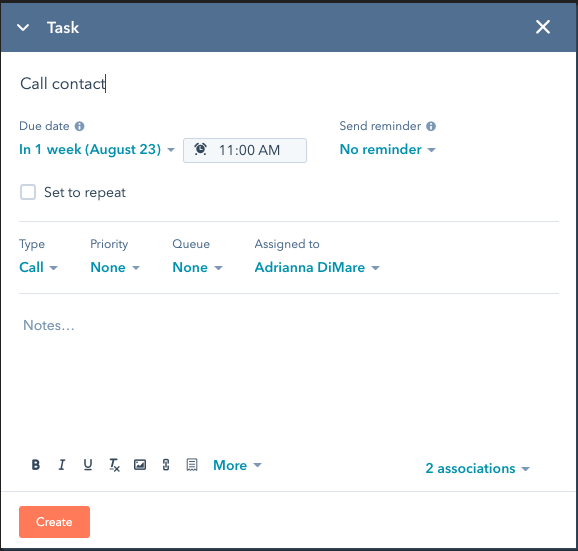
Task Details:
Across HubSpot, task creation involves filling out these fields. Learn about setting default due dates, times, and reminders for all tasks.
- Title: Enter the task name, including “call” or “email” for automatic task type assignment.
- Type: Choose from Call, Email, To-do, Sales Navigator – Send InMail, or Sales Navigator – Connection request (with LinkedIn integration).
- Priority: Assign low, medium, or high priority.
- Association: Link tasks with relevant records.
- Assignee: Designate the task assignee.
- Queue: Add tasks to existing or new task queues.
- Due Date: Specify the task’s due date and time.
- Recurrence (Sales Hub or Service Hub users): Set tasks to repeat at intervals.
- Reminders: Determine when email reminders are sent.
- Notes: Add task-specific details.
Creating Tasks:
Generate tasks across different tools: tasks index page, object index page, or individual records. Sales Hub Professional and Enterprise users can also use sequences.
Creating Tasks on Index Pages and Records From tasks index page:
- In HubSpot, go to Sales > Tasks.
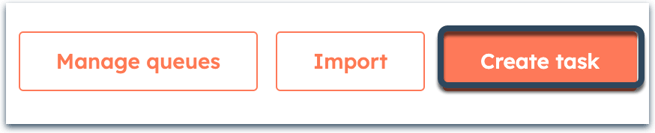
- Click Create task in the upper right.
- Fill in task details on the right panel.
- Click Create to proceed, or Create and add another for consecutive task creation.
For specific records:
- For bulk tasks, select target records, click + Create tasks, and add details.

- For individual records, click the record name, select tasks on the left, and create the task.
How to create quotes in HubSpot
You can create quotes to share with contacts interested in buying a product or service from their company. Use the quotes tool to create a web page that includes pricing information for line items.
📝 NOTE: If you’re using the HubSpot and Shopify integration, you can add products created through the integration.
Create Quotes:
- In your HubSpot account, navigate to Sales > Quotes.
- Click Create Quote.
- To associate the quote with a deal, click the Associate with a deal dropdown menu and select an existing deal, or click the Create a new deal button.
- Click Next.
- Continue setting up your quote by following the steps below. You can save the quote as a draft at any step by clicking Save, then clicking Exit in the bottom left.
📝 NOTE: Drafted quotes can still be enrolled in workflows.
How to create a product in HubSpot
Create a product library of the goods and services you sell, then associate them with individual deals. With products, you can easily track what you’re selling to your customers. When you associate a product to a deal or quote, you are adding a line item, which is one instance of that product.
Review the differences between a product and a line item:
- Product: Represents a good or service available for sale. You can create and manage products within the product library.
- Line items: These are unique instances of a product associated with deal records, quotes, or payment links. Changes to a product in the library won’t affect line items already connected to your deals.
Creating a Product:
You have the option to import multiple products or create individual ones:
- Access your HubSpot account and click the settings icon in the main navigation bar.
- In the left sidebar, go to Objects > Products.
- Click Create product.
- In the right panel, customize the product details.
- Click Save or Save and add another to continue adding products.
📝 NOTE: Discounts can be added for products from the line items editor.
Product details:
- Name: Assign a name to the product or service.
- SKU: If using distinct SKUs for identification, provide a unique SKU for each product.
- Description: Add relevant details such as features, options, or measurements.
- Product Type: Categorize the product type for seamless syncing with other apps.
- Inventory: For stocked physical products.
- Non-inventory: For physical products not kept in stock.
- Service: For non-physical products.
- Images: Input image URLs for quick access.
- URL: If your products are stored outside HubSpot, link to their location.
- Price [currency]: Set the product value in your account’s currency.
- Billing frequency: Determine how often customers are billed.Unit costSpecify cost per unit for profit calculation.
- Multi-currency prices: For accounts with multiple currencies, enter prices for each currency.
- Term length: Define term length in months or years.
- Other custom properties: Any additional custom properties you’ve created will appear in the sidebar.
How to create and customize knowledge base articles in HubSpot
Within your knowledge base, you can create informative articles to address visitor inquiries about your business. These articles can be categorized, tagged, and customized as needed.
To get started:
- Navigate to Service > Knowledge Base in your HubSpot account.
- Click Create article in the upper right corner.
- In the article editor, provide a title, subtitle, and content.
- Utilize the rich text toolbar for basic formatting, videos, links, and images. For more advanced styling, refer to your knowledge base’s template.
Customize the article’s settings:
To customize the article’s settings, click the Settings tab at the top of the article editor, then edit the settings:
1. By default, the article’s URL will end in a URL slug of its title.
2. To customize this URL slug, enter a new URL slug in the URL field.
3. To edit the root URL for all knowledge base articles, click Edit the root URL in settings.

4. To set the language of the article, click the Article language dropdown menu and select a language.
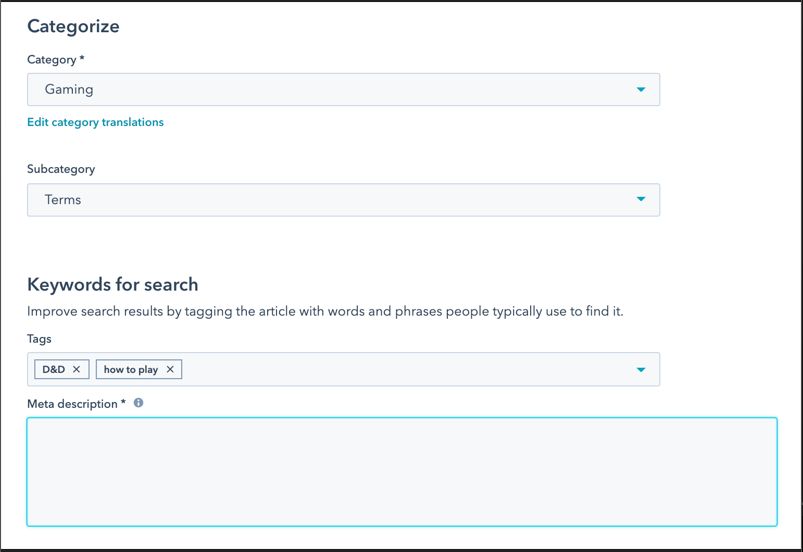
- To assign a category to this article, click the Category dropdown menu and select a category.
- To add this article to a new category, click the Category dropdown menu, then click Create new category. On the category creation screen, enter a name and description for the category, then click Create.
- To assign a subcategory to this article, click the Subcategory dropdown menu and select a subcategory.
- To add this article to a new subcategory, click the Subcategory dropdown menu, then click Create new subcategory. On the subcategory creation screen, enter a name for the subcategory, then click Create.
- To add a tag to the article, click the Tags dropdown menu and select a tag, or type a new tag, then click + Add “[name of your new tag]” tag. Adding tags to an article will widen the search results it appears in.
- To add a meta description to the article, enter a description in the Meta description field. This description will appear in search results below the page title.
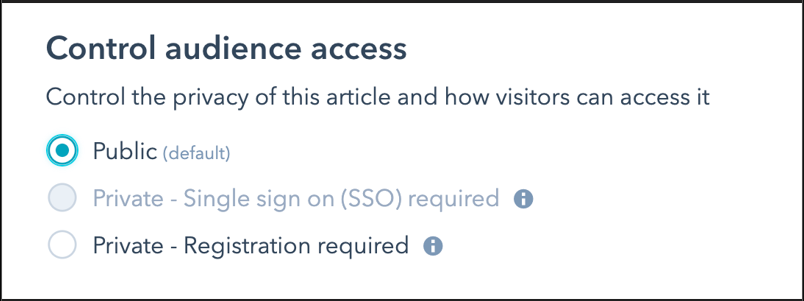
5. To change the visibility of the article, select an option in the Control audience access section:
- Select Public to make the page’s content available to any visitor.
- Select Private – Single sign on (SSO) required to require visitors to log in with your SSO provider. This option is only available if SSO has been set up for the domain where your knowledge base is hosted.
- Select Private – Registration required to require visitors to register with your site to view this article.
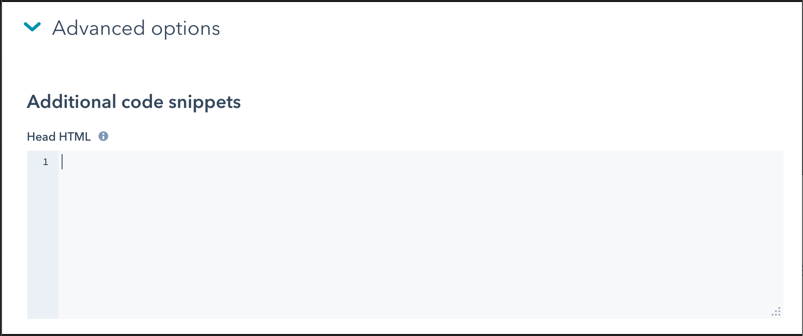
6. To add a code snippet to the head HTML of the article, click Advanced options, then enter the code snippet in the Head HTML field.
Before Publishing:
- Before publishing, preview the article using the Preview option.
- Once satisfied, click Publish or Update to make the article live.
How to create tickets in HubSpot
Efficiently manage customer inquiries and gain insights with tickets. Whether from the tickets index, contact records, or conversations inbox, you can organize all queries seamlessly. Utilize workflows, support forms, and automation for a streamlined process.
Create a new ticket from the tickets index page:
- In your HubSpot account, navigate to Service > Tickets.
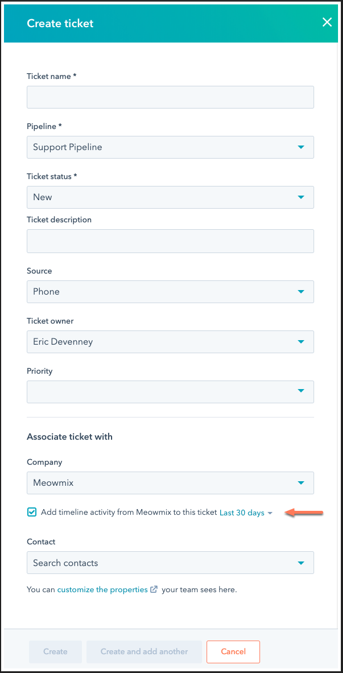
- In the upper right, click Create ticket.
- In the right panel, enter your ticket details. If you want to customize which properties appear here, click Edit this form at the top. The following fields are required by default:
• Ticket name: provide a description for this ticket.
• Pipeline: assign this ticket to a specific ticket pipeline you’ve created.
• Ticket status: choose a specific ticket stage from the pipeline you’ve selected. - To associate a company or contacts with the ticket, click the Company and Contact dropdown menus, then search for the company or contacts.
Create a ticket from a record:
To create a ticket from a record you want associated with the ticket:
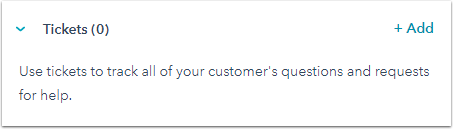
- In the right panel of the record, in the Tickets section, click + Add.
- To create a new ticket, enter the details for your new ticket in the Create a new ticket tab. By default, the ticket will be associated to the contact or company record.
- Once you’re done, click Create.
- A new ticket will be created.
The new ticket will be associated with the record.
Create tickets in your conversations inbox:
You can create tickets in your conversations inbox from the following channels:
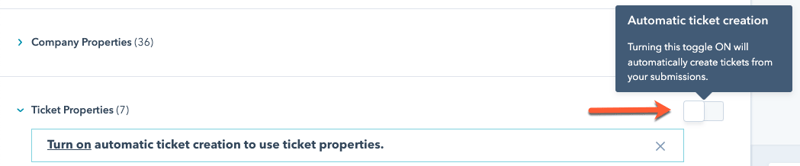
- Connect a HubSpot form in the conversations inbox. Make sure that the form includes ticket properties so submissions to the form will create tickets in your account. You can also respond to the visitor’s inquiry directly in your conversations inbox.
- Create tickets from new incoming emails sent to your team email account. With this setting turned on, tickets will also be created for email threads manually marked as not spam.
📝 NOTE: If someone responds to an existing email thread that’s already associated with a ticket, their email will be added to the existing thread, but a new ticket will not be created.
To view which of your email and form channels are connected to ticket pipelines:
- In your HubSpot account, click the settings settings icon in the main navigation bar.
- In the left sidebar menu, navigate to Inbox > Inboxes.
- In the Connected Channels section, any connected ticket pipelines will appear in the corresponding channel’s Connected to column.
- Click the name of the pipeline to edit the pipeline settings.

