HubSpot Processes Template
Customize this template on how to get started in HubSpot to maximize the productivity of your go-to-market teams.
What is HubSpot?
HubSpot is an inbound marketing, sales, and CRM platform. It aids businesses in customer acquisition, engagement, and retention.
Features include the Marketing Hub for campaigns and analytics, the Sales Hub for sales process management, the Service Hub for customer support, a CRM, CMS for websites, automation, and robust analytics.
HubSpot is user-friendly and suitable for various business sizes. It emphasizes inbound marketing by creating valuable content to attract customers.
Learn how to 3x revenue growth by combining the power of Spekit and HubSpot.
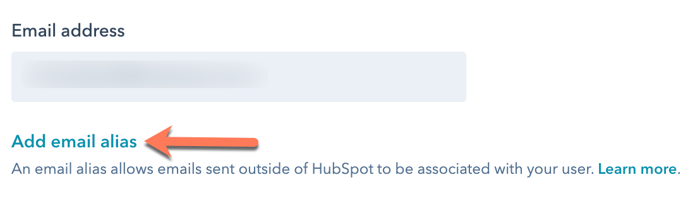
How to add an email alias in HubSpot
An email alias is an alternate address that points to a user’s existing email account.
- When you send an email from the CRM with a connected inbox, the From address defaults to your user email address.
- You can connect more than one inbox to HubSpot if you want to send emails from the CRM with other email addresses.
- If you want to send emails from an email alias, you can do so from the CRM depending on your email provider.
- Or, you can manually add the email alias in your Profile & Preferences so emails sent outside of HubSpot can log to the CRM.
📝 NOTE: An email alias cannot be used to send emails from a team email address connected to the conversations inbox.
Alias support for Gmail inboxes:
If you have connected a Gmail inbox that already has an alias set up, you can send emails from the CRM using the alias.
📝 NOTE: To send from the alias in the CRM, you must add the alias to your Gmail account before connecting the inbox.
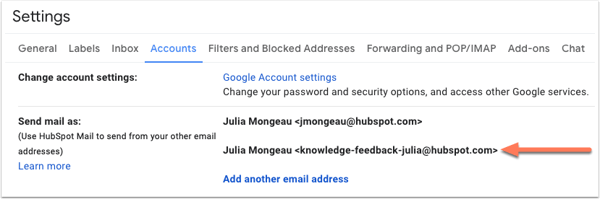
When you connect your Gmail account to HubSpot, HubSpot automatically detects the Gmail alias and adds it as a From address.
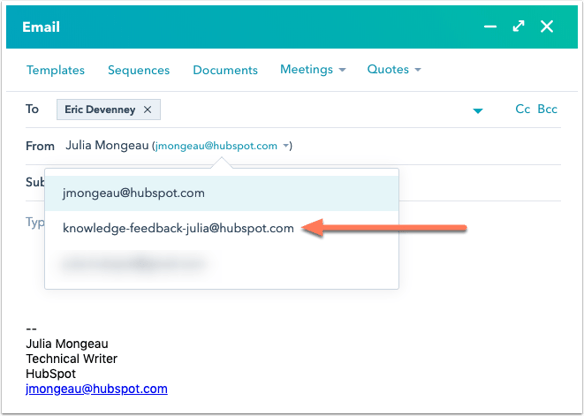
You can select the Gmail alias in the From dropdown menu in the email composer:
- In your HubSpot account, navigate to contacts, companies, deals, or tickets.
- Click the name of a record.
- In the left panel, click the Email icon email.
- In the email composer window, click the From dropdown menu and select the alias.
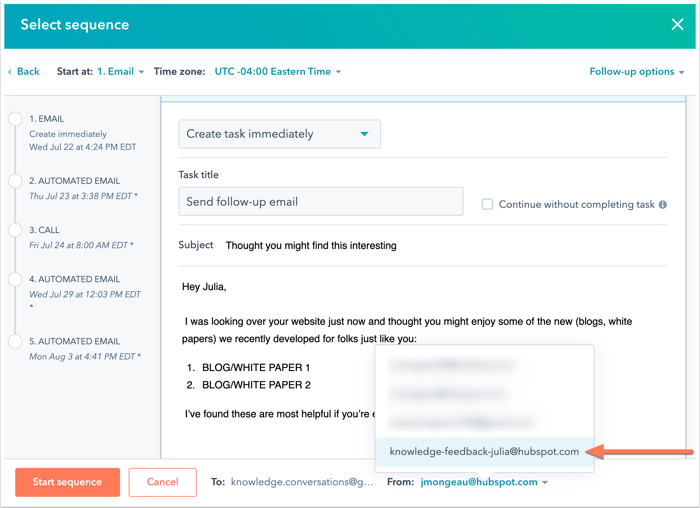
If you are enrolling contacts in a sequence from the CRM, you can also select the alias as the From address in the Select sequence dialog box.
Alias support for Office 365 and IMAP-connected inboxes:
If your inbox is connected to HubSpot using Office 365 or IMAP, you cannot use an email alias to send emails from within the HubSpot CRM.
If you’re using the Outlook app, you can use an alias to send emails from your connected email address and log them to HubSpot using the BCC address or the HubSpot Sales email extension.
The aliases are not automatically added to HubSpot when connecting your inbox with Office 365 or IMAP, so you must add the alias to your Profile & Preferences:
- In your HubSpot account, click the settings settings icon in the main navigation bar.
- In the left sidebar menu, click General.
- In the Email Aliases section, click Add email address.
- Enter the email alias, then click Save.
How to add or remove parent and child companies on an individual record
In HubSpot, you can create parent-child relationships between companies. This can be done manually for individual records or in bulk through imports.
A parent company can have up to 10,000 associated child companies, while each child company can only be linked to one parent company.
To associate parent or child companies with a company record:
- In your HubSpot account, go to Contacts > Companies.
- Click on the name of the company you want to edit.
- In the right panel, under Related companies, click Add parent company or Add child company.
📝 NOTE: This feature might not be visible if it has been removed by a super admin.
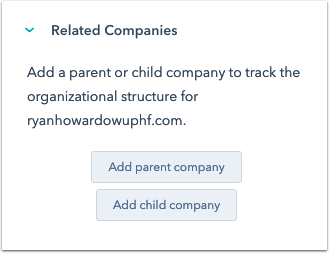
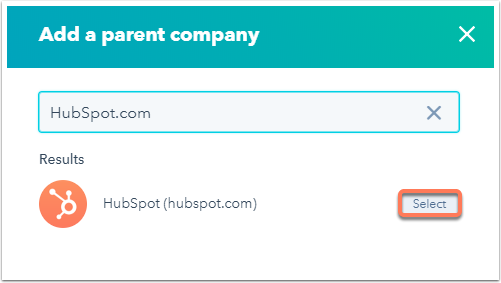
- If adding a parent company, search for the desired company in the dialog box and click Select. The parent company will be displayed under Related companies in the right panel.
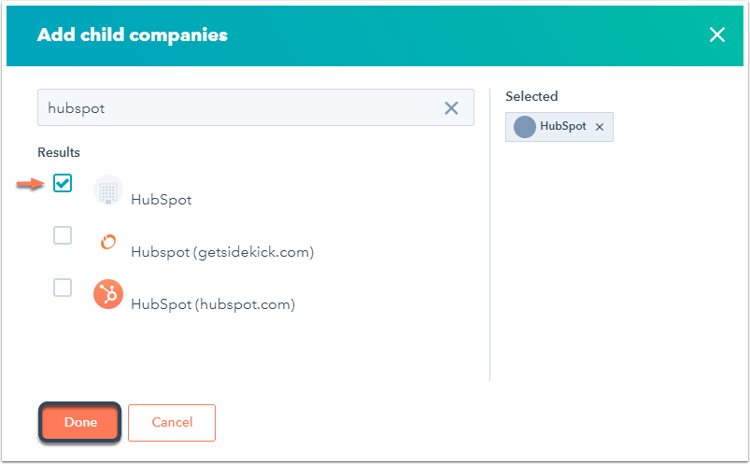
- If adding child companies, select the checkboxes next to the desired child companies, then click Done in the dialog box. All added child companies will be shown under Related companies.
To remove a parent or child company association:
- In the Related companies section, hover over the company you want to remove.
- Click the X icon, and in the dialog box, click Remove to confirm.
How to change your HubSpot user’s email address
Discover how to update your HubSpot user’s email address.
📝 NOTE: You can only modify your own email address; making changes for other users within the account isn’t feasible.
How to change your HubSpot user’s email address:
- Log in to your HubSpot account and click on your account name in the top right corner, then select Profile & Preferences.
- From the left sidebar menu, navigate to General > Security.
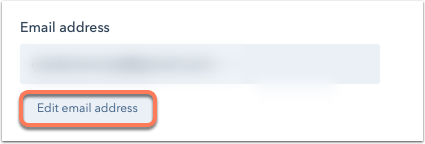
- In the Email section, click Edit email address.
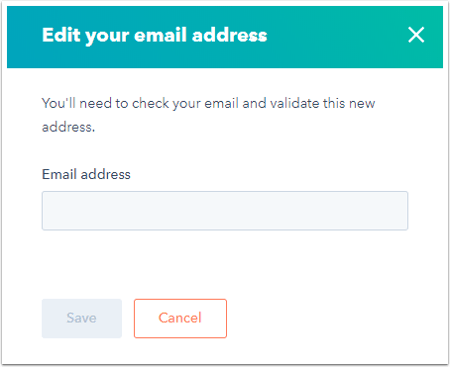
- In the dialog box, input your new email address.
- Click Save. Your new email address will be awaiting validation.
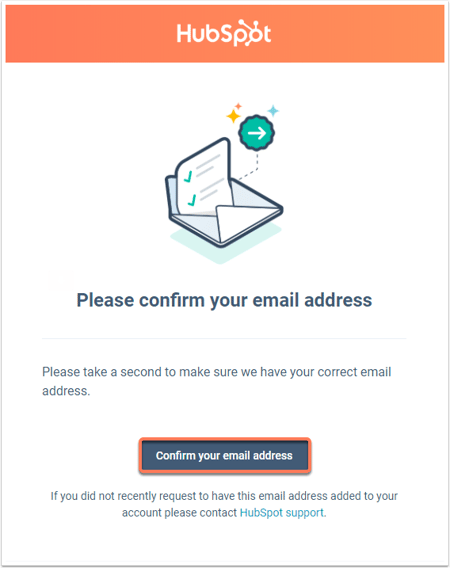
- Afterward, you’ll receive an email in your new email address inbox. In that email, click Confirm your email address to validate the new email.
- If you’re prompted to log in to HubSpot again after clicking Confirm your email address, use your original login credentials to access your account.
Important points to remember:
- You can’t alter your email address unless you’re logged into your HubSpot account.
- During the reset process, if prompted for a password, use your HubSpot login password.
- Editing your email address to match an existing HubSpot user’s isn’t allowed, even if they lack access to your HubSpot account, unless the user has been permanently deleted.
- If Single Sign-On (SSO) is active, you can’t change or add an email address for your user. To update or add an email, temporarily disable SSO first.
How to create playbooks in HubSpot?
With the playbooks tool, you can create interactive content cards in contact, company, deal, and ticket records. These cards serve as standardized notes during conversations with prospects and customers.
To create a playbook:
- Navigate to Sales > Playbooks in your HubSpot account.
- Click Create playbook in the upper right.
- Choose a template or create one from scratch.
- At the top of the page, click the edit pencil icon and enter a title for your playbook.
- Click Create playbook.
- Click anywhere in the playbook text editor to write. Use the toolbar at the top to format your content, or insert links, images, embed codes, or questions & answers.
- Insert links, images, embed codes, or questions & answers.
- Configure question-answer pairs and update properties if needed.

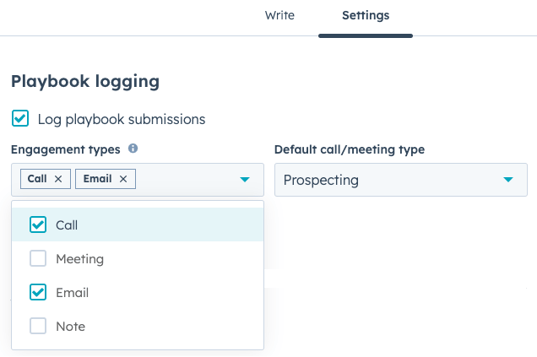
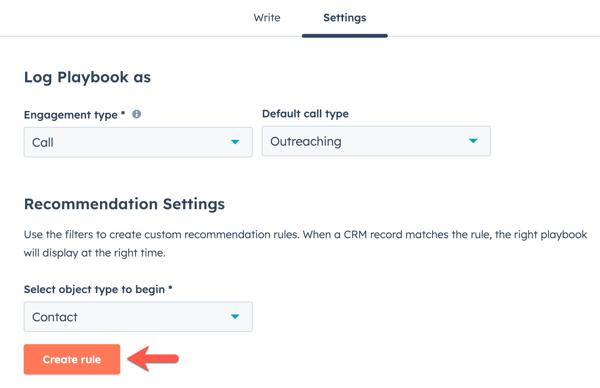
- After writing your playbook content, click the Settings tab.
• To log playbook submissions, click the Log playbook submissions checkbox.
• To specify the type of engagements a playbook will save to a record, click the Engagement types dropdown menu and click the checkbox next to your preferred engagement types. The engagement type will default to Call.
• When logging a call or meeting engagement, you can also select the call or meeting type (e.g. Prospecting, Leading) under the Default call/meeting type dropdown menu.
- You can also recommend playbooks based on specific record properties.
1. To do this, create rules in the Recommendation Settings section by selecting object types, filters, and parameters. Click + Create rule.
2. On the Filters right sidebar, click + Add filter.
3. Select a filter category from the Current Object or Associated Object Information list. Then, select a filter from the property list.
4. Click the dropdown menus to select the parameters for the filter. To add more filters, click + Add filter on the bottom left of the filter editor. - Once your playbook is customized, click Publish to make it available.
How to delete and restore products in HubSpot?
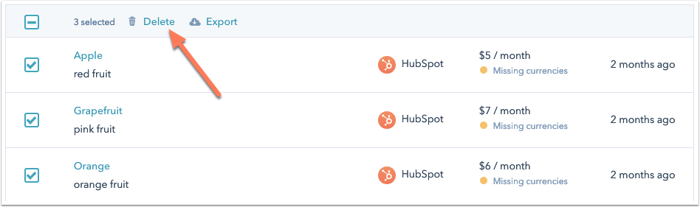
You can delete multiple products at once by:
- Select the checkboxes next to the products to delete
- At the top of the table, click Delete.
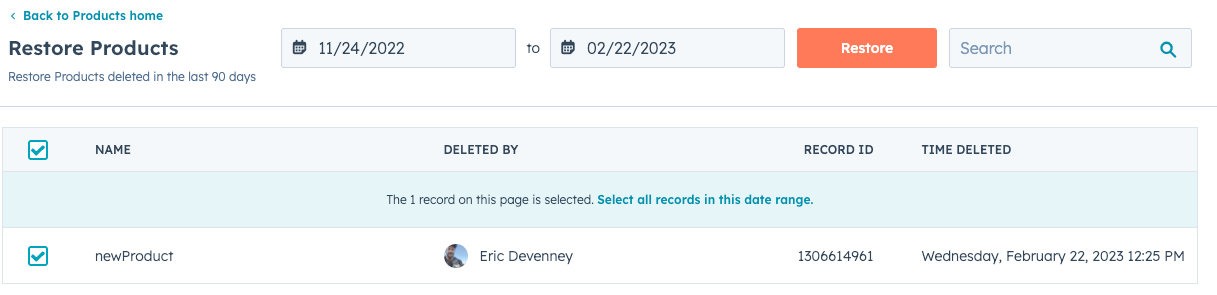
To restore products that have been deleted within the past 90 days:
- Click the Actions dropdown menu, then select Restore products.
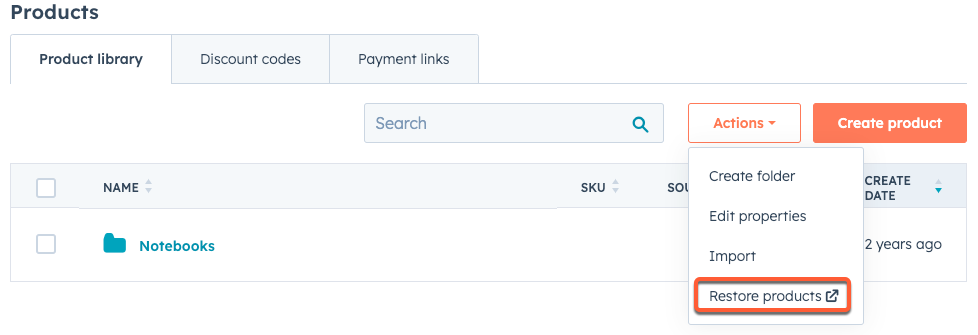
- On the next screen, select the checkboxes next to the deleted products you want to restore. To filter products by the date range they were deleted in, use the date pickers above the table.
- Click Restore.
- In the dialog box, enter the number of records you want to restore, then click Restore.
How to edit a property value for a record in HubSpot
You have the flexibility to modify or add property values within individual records. For bulk editing of property values, you can explore methods like editing from the object’s index page, utilizing imports, or employing workflows.
📝 NOTE: Read-only properties, such as Create date and Original source, are established by HubSpot analytics or third-party integrations and are not editable manually.
For editing property values on the object index page, follow these steps:
- Navigate to the relevant records section (Contacts, Companies, Deals, Tickets, or Custom objects) within your HubSpot account.
- In the table view, click on the property of the record you want to edit. You can customize the displayed properties.
- Depending on the field type, either select or type in the new value for the property. Note that associations and properties in the left-most column cannot be edited.
- You can repeat this process to edit other properties.
- Once you’ve made the desired changes, click Save.
For individual record property editing, use the following steps:
- Go to the section containing your records (Contacts, Companies, Deals, Tickets, or Custom objects) in your HubSpot account.
- Click on the name of the specific record you wish to edit.
- In the left panel’s About section, select a property to edit and enter or choose a new property value.
- After making the necessary changes, click Save.
- If the property you wish to update is not visible, you can find it by clicking View all properties at the bottom of the About section.
• On the Manage properties page, you can search or browse for the property, and then select or enter the new value.
🔔 Remember: if you’re encountering difficulty saving a new value, it might be due to the property requiring a unique value. In cases where the desired property isn’t available, you can create a custom property to suit your needs.
How to export your products in HubSpot
To export your products:
- Select the checkboxes next to the products to export, or select the checkbox next to the Name column heading to select all products.
- At the top of the table, click Export.
- In the dialog box, select a file format from the dropdown menu, then click Export.
How to schedule a meeting with a contact in a record in HubSpot
After integrating Google Calendar or Office 365, effortlessly schedule meetings with contacts from records and send invites. You can even add attendees.
📝 NOTE: Sales Hub Pro/Enterprise users can schedule for others with seats. This guide applies to Google/Office 365 integration; see creating/editing scheduling pages after calendar-tool connection.
📝 NOTE: Sandbox accounts allow meetings with sandbox users only.
Schedule a meeting for yourself
- In HubSpot, navigate to contacts, companies, deals, or tickets.
- Select a record.
- In the left panel, click Schedule a meeting for a pop-up of your calendar.
- Configure your meeting:
• Set Duration.
• Pick a time.
• Enter Title.
• Choose Meeting type (if customized).
• Add Attendees.
• Select Location (phone, in-person, video).
• Provide Attendee description.
• Add Internal Note.
• Associate with relevant records.
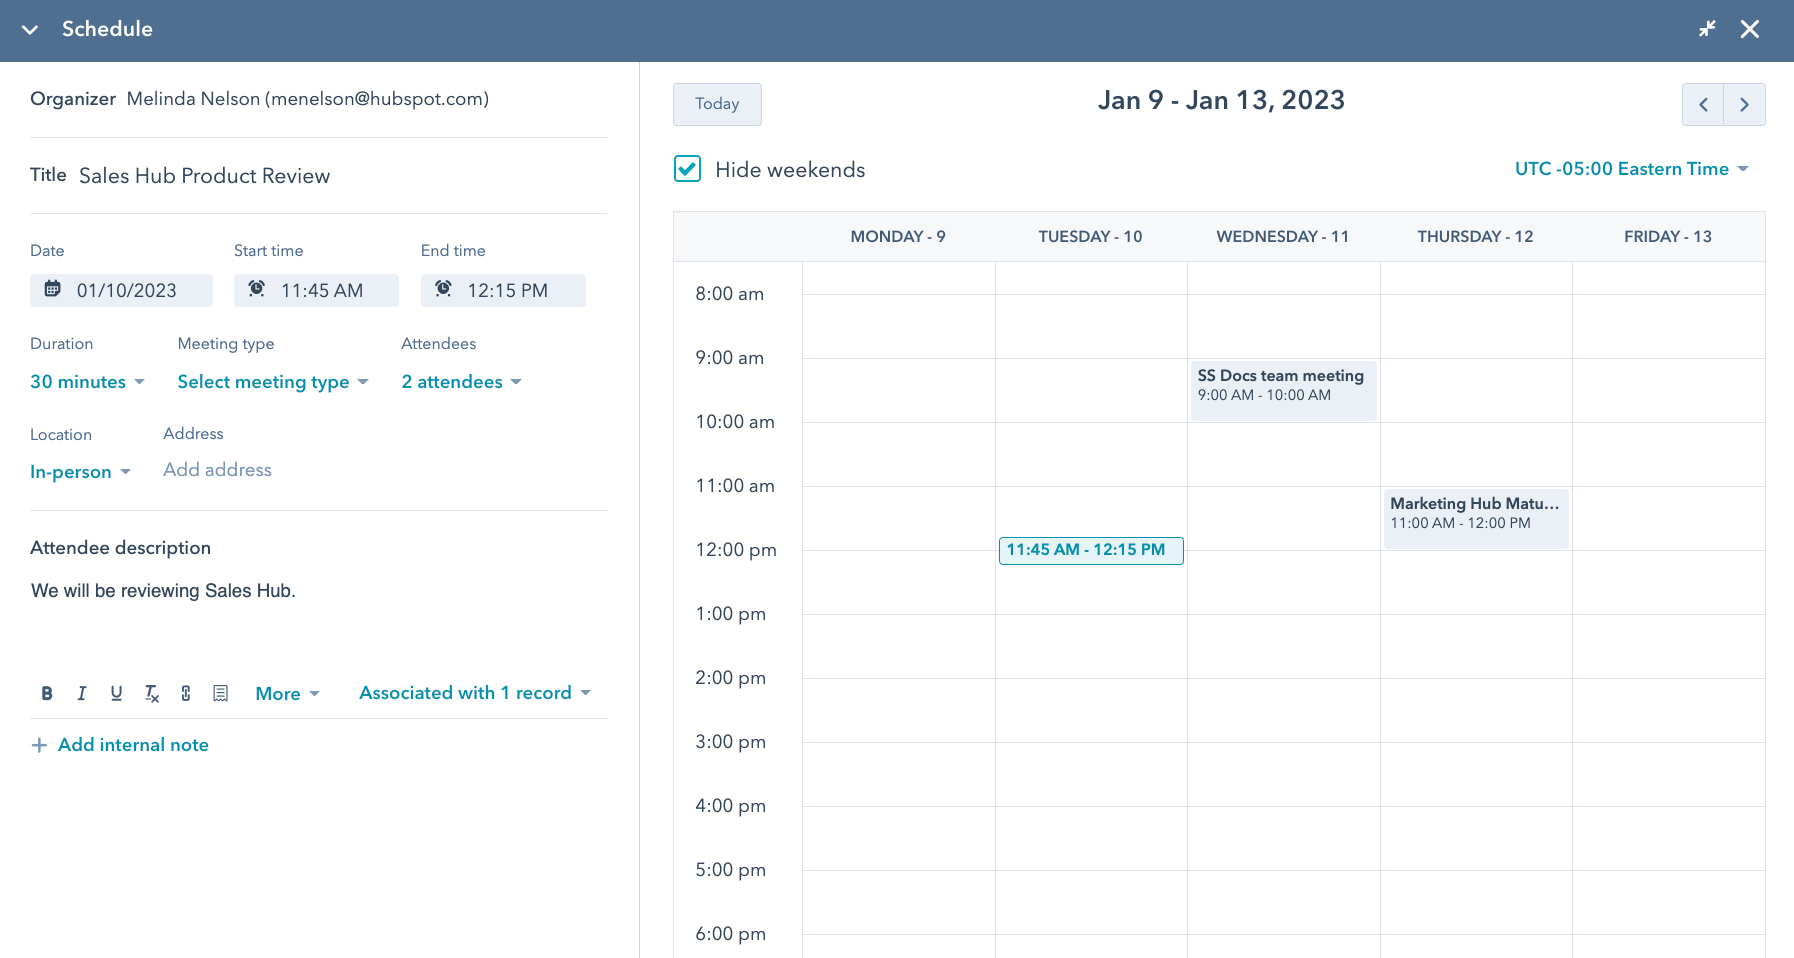
- Collapse icon schedules without viewing calendar.

- Click Save.
• The contact needs to have a valid email address populated in the Email property to receive an invitation.
• Once the meeting is scheduled, your contact will receive an invitation with an .ics file which can be added to their calendar.
• A meeting will automatically be created for you in your calendar.
How to set tasks to repeat in HubSpot
When configuring a repeating task, a fresh task will automatically generate upon completion, deletion, or overdue status of the previous one. If a repeating task becomes overdue, both the original task and the new one will be displayed for completion.
- Navigate to your tasks or records:
• Tasks: In your HubSpot account, navigate to Sales > Tasks.
• Contacts: In your HubSpot account, navigate to Contacts > Contacts.
• Companies: In your HubSpot account, navigate to Contacts > Companies.
• Deals: In your HubSpot account, navigate to Sales > Deals.
• Tickets: In your HubSpot account, navigate to Service > Tickets.
• Custom objects: In your HubSpot account, navigate to Contacts > [Custom object]. If your account has more than one custom object, hover over Custom Objects, then select the custom object you want to view. - If you’re on the tasks index page, in the upper right, click Create task.
- If you’re on an object index page, to create a repeating task for a record, click the name of the record. In the record’s left panel, click tasks Task.
- In the right panel or in the record’s task editor, select the Set to repeat checkbox.
- Enter or click the arrows to select a number, then use the dropdown menu to select days, weeks, months, or years as the interval of time for your task to repeat (e.g., every 2 months).

- Enter the remaining details for your task, then click Create.
- To halt new recurring tasks, edit a task in the series, and clear the Set to repeat checkbox.
How to setup the forecast tool in HubSpot
Supervisors can effectively oversee team progress using the forecast tool. This involves configuring the forecast deal amount, creating forecast categories, and setting revenue goals.
📝 NOTE: Configuring the tool and editing categories requires Super Admin privileges. Users with Forecast permissions can utilize the tool but cannot edit categories.
Set Up Forecast Deal Amount
The forecast deal amount governs how amounts display in the tool and related reports. Users with Forecast permissions default to using Weighted amount.
- In your HubSpot account, click the settings icon in the main navigation bar.
- Navigate to Objects > Forecast.
- Choose the Forecast deal amount from the dropdown:
• Weighted amount (Amount multiplied by Deal probability)
• Total amount (full deal amount)
• Forecast amount (legacy, for pre-July 19, 2021 accounts)

Set Up Forecast Period
The forecast period establishes the time frame for revenue goals and submissions across pipelines.
- Click the settings icon in the main navigation bar.
- Go to Objects > Forecast.
- Select a monthly or quarterly forecast period from the dropdown.
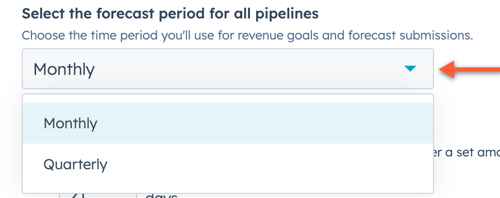
📝 NOTE: If you edit the forecast period, the revenue goals and forecast submission will be reset for all pipelines. You will need to create new revenue goals and forecast submissions.
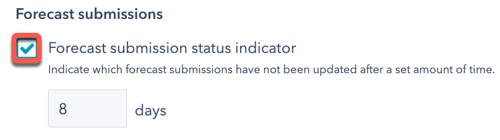
Configure Forecast Submission Status Indicator
Enable the forecast submission status indicator to display for users who haven’t updated forecasts within a specified timeframe.
- Click the settings icon in the main navigation bar.
- Navigate to Objects > Forecast.
- In Forecast submissions, check the Forecast submission status indicator checkbox. Set the number of days (up to 31).
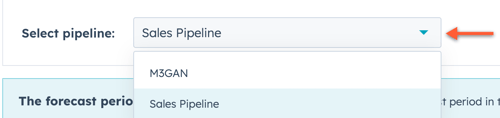
Organize Pipeline Forecast Categories
Forecast categories group deals by likelihood to close. Customize these:
- Click the settings icon in the main navigation bar.
- Go to Objects > Forecast.
- Click the Pipelines tab.
- Select a pipeline to modify.
- Use category dropdown menus to categorize deal stages.
- Include stages by checking checkboxes.
• Not forecasted: deals not in the forecast
• Pipeline: low likelihood of closing.
• Best case: moderate likelihood of closing.
• Commit: high likelihood and committed.
• Closed won: closed in the forecasted time.
- Click Save.
📝 NOTE: Moving forward, your deals will be categorized into one of the forecast categories based on their deal stage.
Edit the Forecast Categories
You can manually update forecast categories on deal records.
- Access your HubSpot account and click the settings icon in the main navigation bar.
- In the left sidebar, go to Objects > Properties.
- At the top, use the Filter by dropdown and choose Deal properties.
- Find the Forecast category property, hover over it, and click Edit.
- In the right panel, modify an existing property or add a new category.
- Click Save.
• Only the last five property values will appear in your forecast category mapping alongside Not forecasted and Closed won.
• To include more categories, rearrange property values in the last five positions.
📝 NOTE: Although only the last five categories display in forecast settings, you can choose any category when manually updating a deal’s Forecast category property.
Setting Sales Goals
Once you customize your forecast categories, you need to assign revenue goals to your team.
- In your HubSpot account, navigate to Reports > Goals.
- In the upper right, click the Edit goals.
- In your Goals settings, click Create in the upper right.
How to upload and share documents in HubSpot
Empower your team with the documents tool to create a centralized content repository. Collaboratively upload and share files with contacts seamlessly.
Adding a Document
- In HubSpot, go to Sales > Documents.
- Click Upload document and pick the file source. Accepted formats are .pptx, .pdf, .docx, or .xlsx.
- Once uploaded, the document appears in your dashboard.
📝 NOTE: Due to public sharing, avoid sharing sensitive information via the documents tool. Disclosure: Documents uploaded using this tool are stored and shared within your HubSpot account.
Sharing Documents with Contacts
Share documents via a link or email template. HubSpot tracks document views, notifying the owner when contacts access them. You can also request email confirmation from recipients.
📝 NOTE: Sharing via third-party services like LinkedIn might tally views.
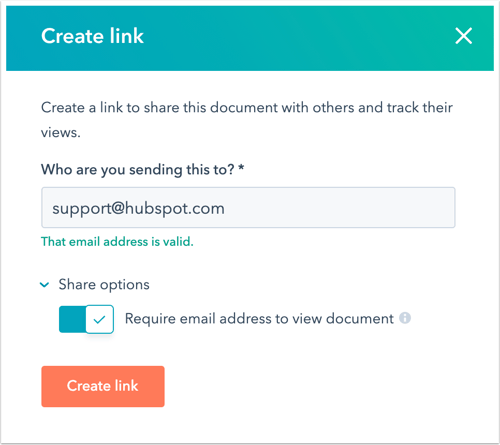
Creating a Shareable Link In HubSpot
- In your HubSpot account, navigate to Sales > Documents.
- Hover over a document, click the Actions dropdown, then select Create link. Alternatively, click the document name and use the Create link option.
- In the dialog, enter the recipient’s email.
- To track views, toggle on Require email address to view document.
- If the document’s Enable Privacy and Consent (GDPR) toggle is not turned on, to track the individuals who view this document, click Share options, then click to toggle Require email address to view document switch on.
• If the document’s Enable Privacy and Consent (GDPR) toggle is turned on, the individuals will need to enter their email address and confirm that they’re giving consent to be contacted before they are able to view the document. - Click Create link.
- Copy the link or compose an email with the link from a contact’s record.
📝 NOTE: Generated links are hubs.ly URLs, as custom domains aren’t supported. Alternatively, use HubSpot Sales Chrome extension, Outlook desktop add-in, or Office 365 add-in for emailing document links.
How to use automations with forms in HubSpot
In the Automation tab of a form, you have the power to dictate post-submission actions.
Activate straightforward automation features like sending follow-up emails to contacts or internal notifications to HubSpot users. Additionally, you can utilize form submissions as triggers within simple workflows.
Here’s how to configure your form’s automation:
- Go to Marketing > Lead Capture > Forms in your HubSpot account.
- Click the name of an existing form and select Edit to integrate follow-up emails or build a new form.
- Inside the forms editor, access the Automation tab.
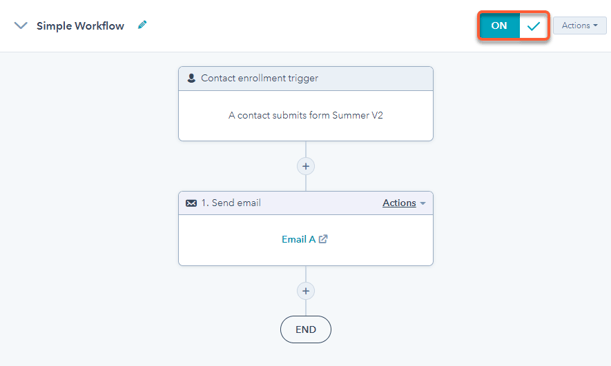
Creating Simple Workflows:
Initiate simple workflows from the form editor to automate actions such as email sends or task creation. Consider the following when crafting a simple workflow:
- The enrollment trigger, by default, is tied to form submission and cannot be changed.
- Contacts get enrolled in the workflow each time the form is submitted, even if they were enrolled previously.
To create a simple workflow:
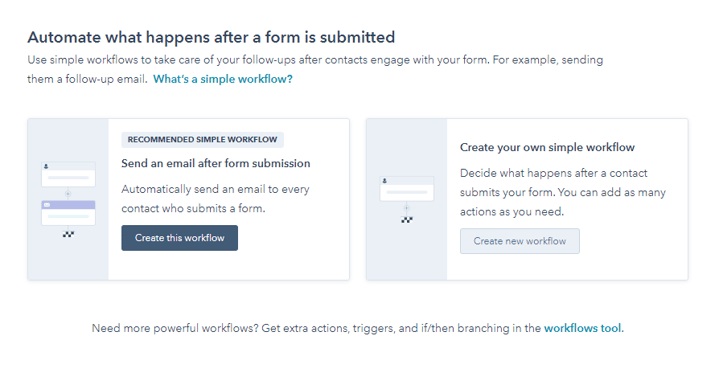
In the Automate what happens after a form is submitted section:
- To automatically trigger follow-up emails post-form submission, click Create this workflow under “Send an email after form submission.”
To craft your own workflow from scratch, choose Create new workflow under Create your own simple workflow. Specify A contact submitted a form as the triggering condition.
Further Workflow Actions:
- Add actions using the + icon.
- Edit actions by clicking Actions > Edit on the specific action.
- Remove actions by clicking Actions > Delete, either for the selected action or subsequent actions.
- Attach notes to actions using the comments icon for reference.

Managing and Publishing:
- Rename workflows by clicking the edit pencil icon in the workflow header.
- Delete workflows by selecting Actions > Delete workflow.
- Activate workflows by toggling the switch next to the workflow name, then confirming with Got it. Any workflow adjustments will automatically apply to enrolled contacts upon publishing.