Mixmax Processes
Reinforce critical processes, playbooks, and best practices within your sales reps' day-to-day workflows with Spekit.
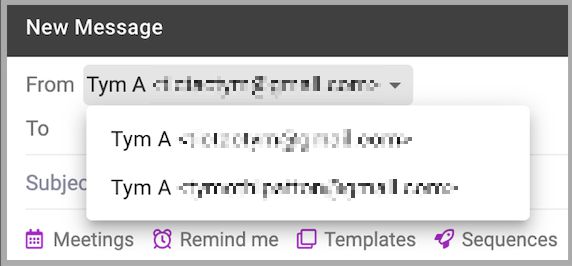
1. Add Send-as email addresses and aliases in Mixmax
To add a new send-as email address or email alias to Mixmax, follow these steps:
- Open Gmail Settings by clicking on the gear icon in the top right corner and selecting See all settings from the dropdown.
- Go to the Accounts tab.
- Next to Send mail as, click on Add another email address.
- Enter the desired email address.
- Click on Import Email Addresses to Mixmax.

After importing your email addresses to Mixmax, you can select the new email address from the From field in the Compose window.
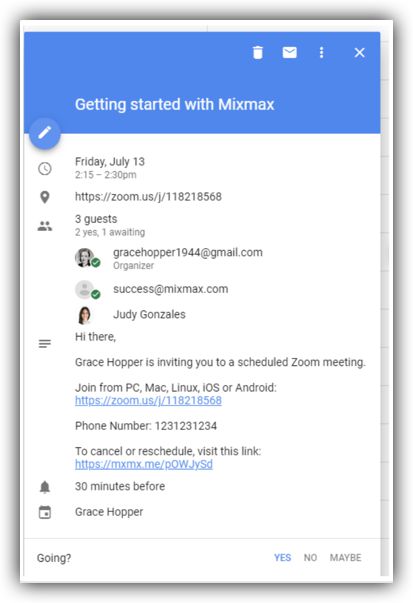
2. Add a Zoom Link in Mixmax
With the Mixmax Zoom integration you can automatically add a unique Zoom link to your meeting templates, calendar invites, and availability shares.
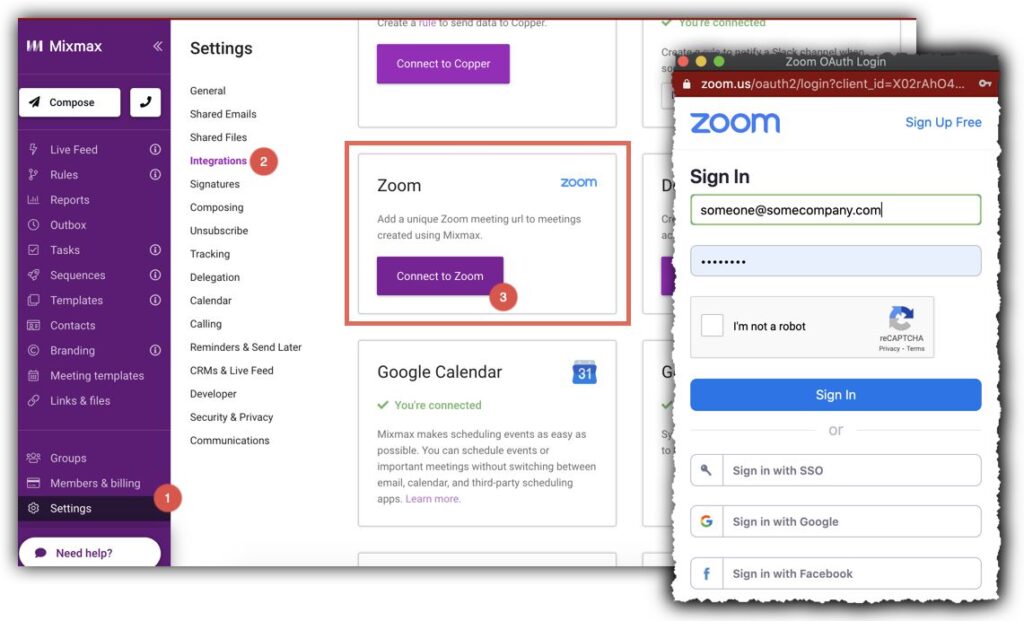
Connect to Zoom
To connect to Zoom using your email and password:
- Visit your Integrations Settings page
- Click Connect to Zoom in the Zoom section.
- Enter your Zoom login credentials and click Sign in.
Alternatively, if you sign into Zoom with Google or Facebook:
- Open your Integrations Settings page.
- Open a new browser tab.
- Log in to your Zoom account using the corresponding sign-in option. Return to the Integrations Settings page and click Connect to Zoom.
Adding a Zoom Link to your Meeting Templates
To add a Zoom link to your Mixmax Meeting Templates:
- Go to your Meeting Templates Dashboard.
- Select the desired template.
- Enable the Zoom conference call toggle.
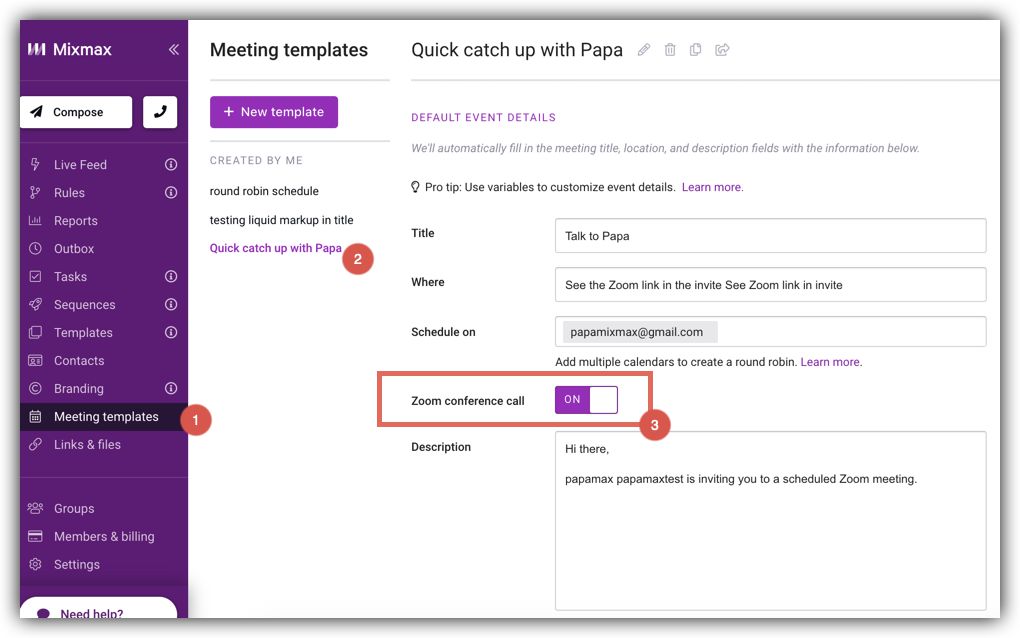
- This will automatically include a Zoom link in the Location and Description fields of the meeting.
- If there is existing information in those fields, the Zoom information will be added at the beginning.
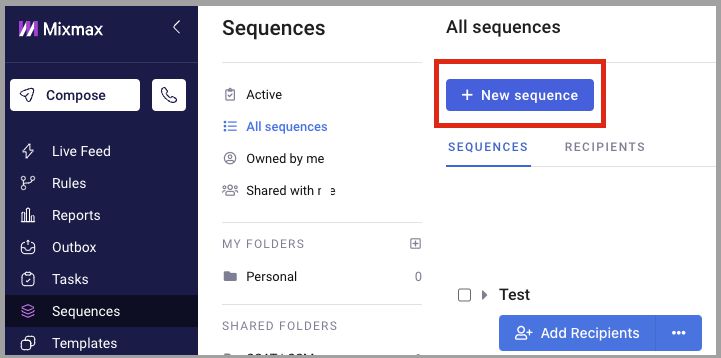
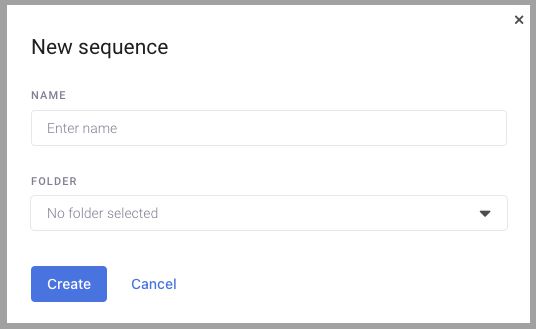
3. Create a New Sequence in Mixmax
To create a new sequence, follow these steps:
1. Go to the Sequences section of your dashboard and click + New Sequence.
2. Provide a title for your sequence, and a folder to host the sequence.
3. Import a list of recipients from Salesforce, a contact list, or a CSV file.
- Alternatively, you can add email addresses manually.
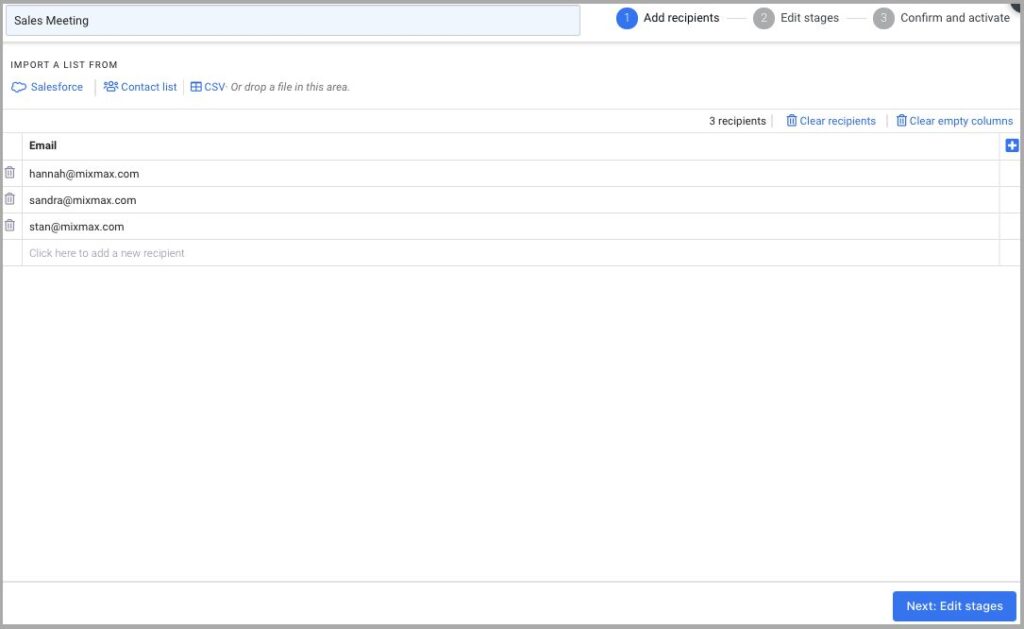
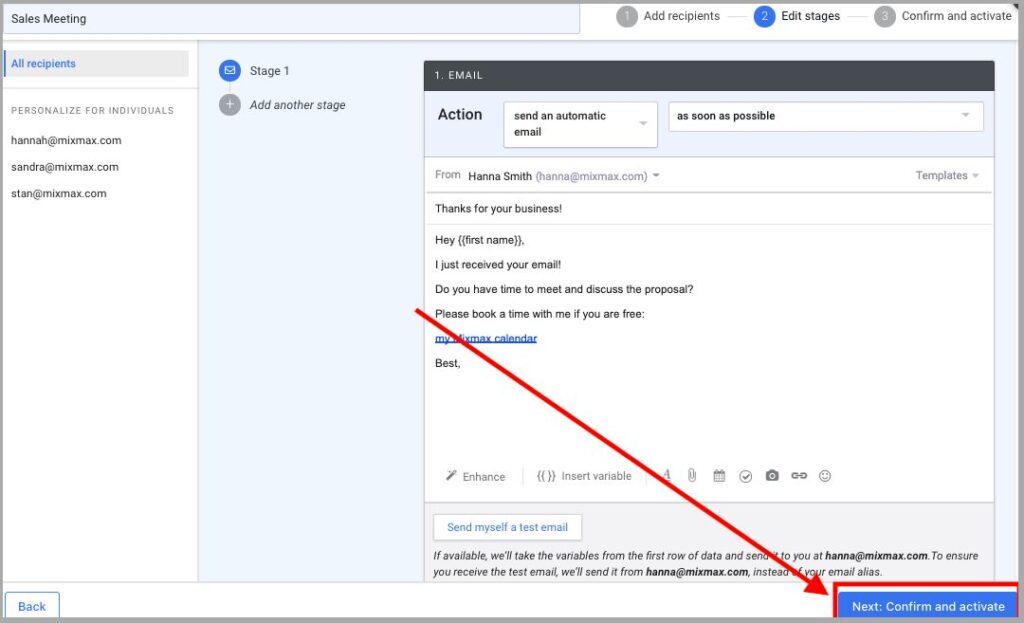
4. Customize the content and schedule for each stage of your sequence. You can use variables, templates, and include follow-up stages. When satisfied, click Next: Confirm and active.
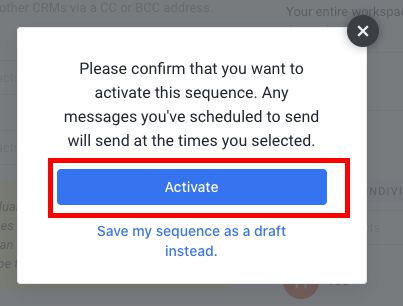
5. Confirm your readiness to send the sequence by clicking the Activate button.
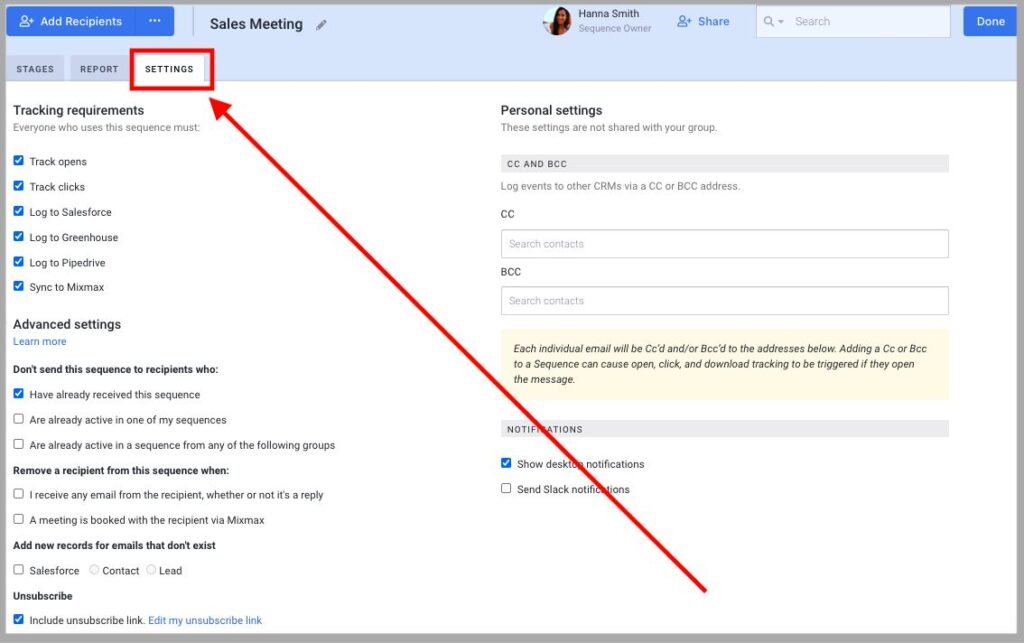
6. Manage sequence settings, such as tracking requirements and sharing options, on the Settings tab.
7. Once the sequence is activated, you can view performance reports from your Sequences page.
4. Create a Template in Mixmax
To create a new template in Mixmax, follow these instructions:
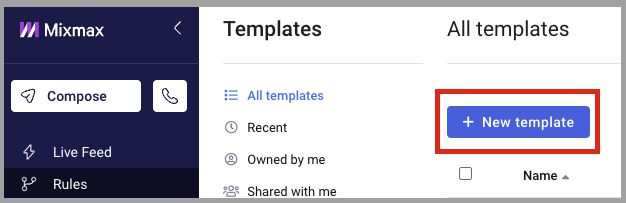
1. Go to the Templates page on your dashboard and click New Template.
2. This will open a compose window where you can create your template. Make sure to provide a unique name for the template and assign it to a folder.
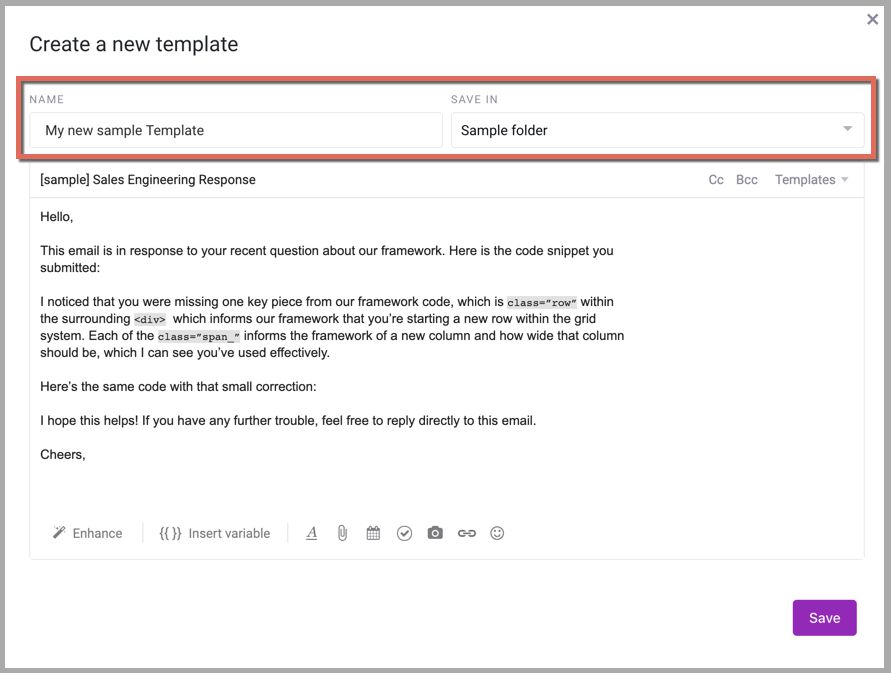
3. Once you’re satisfied with the template’s content, click the Save button at the bottom of the compose window.
5. Meeting Reminder Emails in Mixmax
Mixmax Meeting Templates allow you to create web pages for guests to book meetings on your calendar effortlessly.
With Mixmax automation, you can also send automated reminder messages to clients, candidates, and customers before a meeting starts, ensuring they show up on time.
Scheduling Email Reminder
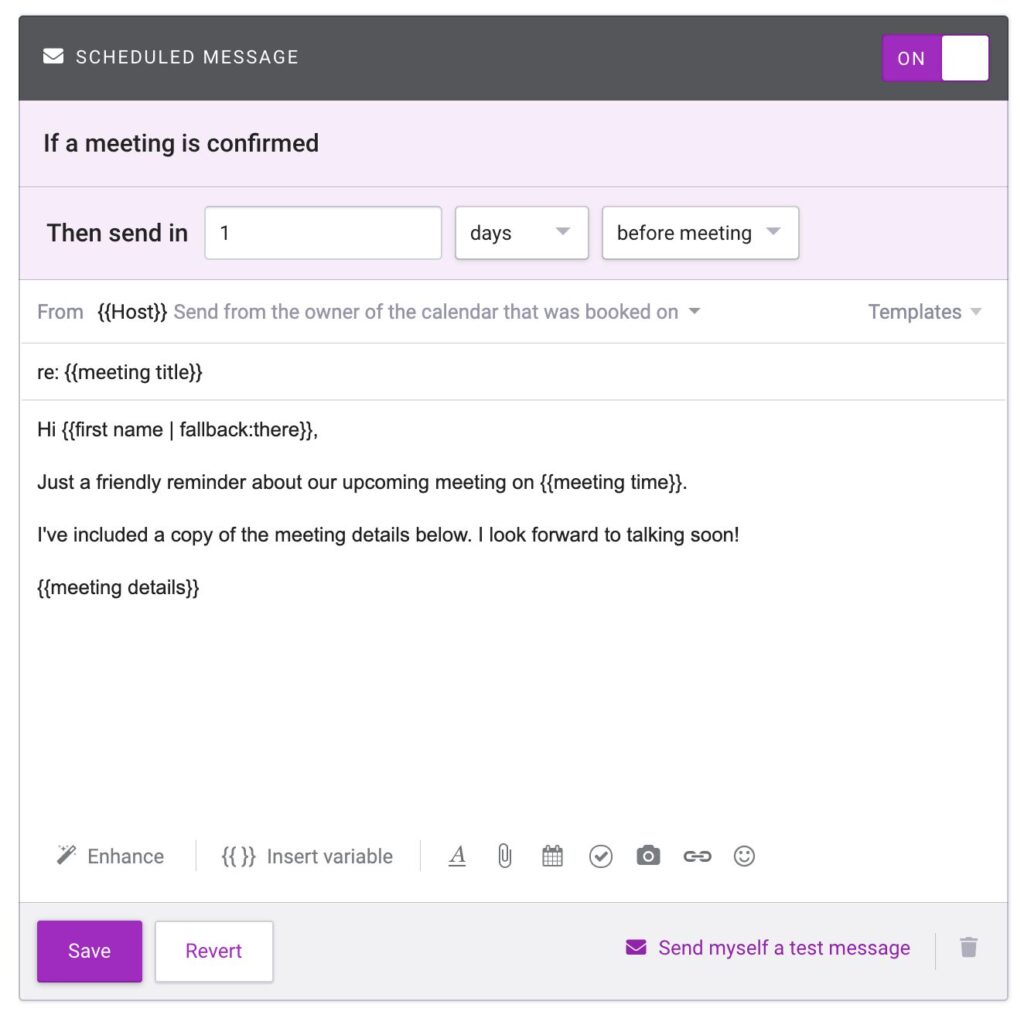
To set up an automatic meeting reminder, follow these steps:
- Go to any Meeting Template and find the Automation section.
- Customize the message and specify when it should be sent before the meeting.
- Activate the scheduled message in the top right corner.
If the meeting is rescheduled or the details are edited by the attendee, don’t worry! The scheduled message will be automatically updated to send at the correct time.
However, if the meeting is canceled by the attendee, the reminder will not be sent.
🛑 Note: If these updates occur less than 30 minutes before the scheduled reminder, it will not be updated. You can always edit your meeting reminders in your Outbox.
Automation Variables
When scheduling your message, you can use Meeting Template Variables in your email subject or body text. These variables will automatically display the details of the specific meeting for which the reminder is being sent.
Here are some additional variables you can use to describe your meeting:
- {{meeting time}}: Shows the scheduled meeting time in [Day of week], [Day of month], [Time of day] format (e.g., Monday, Jul 16, 3:00pm PDT).
- {{meeting title}}: Displays the text from the Title field of your Meeting Template.
- {{meeting location}}: Shows the text from the Location field of your Meeting Template.
- {{meeting description}}: Displays the text from the Description field of your Meeting Template.
- {{time to meeting}}: Indicates the amount of time from when the reminder email is sent to when your meeting is set to begin.
6. Schedule an Email to Send Later in Mixmax
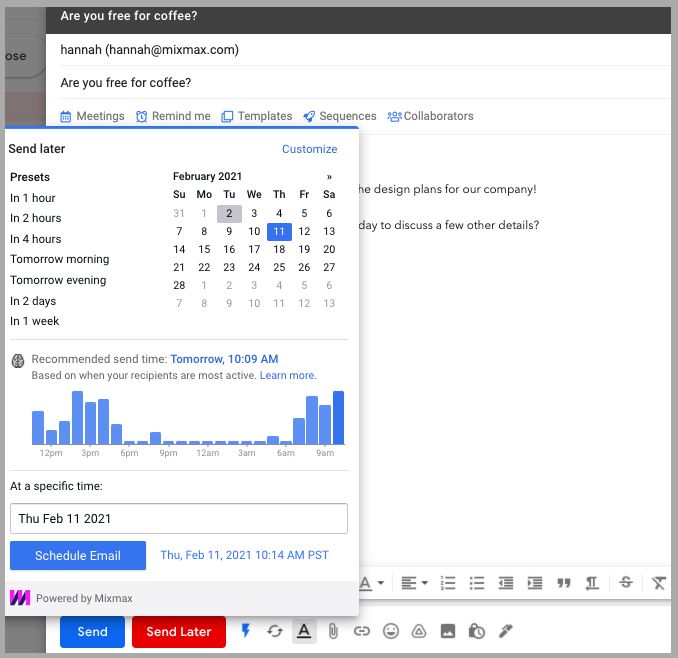
Mixmax enables you to schedule an email to be sent later.
Schedule an Email
To schedule an email to be sent later:
- Click Send Later in the bottom bar of the compose window.
- You can choose from preset times or enter a specific time.
- The Send Later feature has natural language processing, allowing you to type almost anything in the scheduling box.
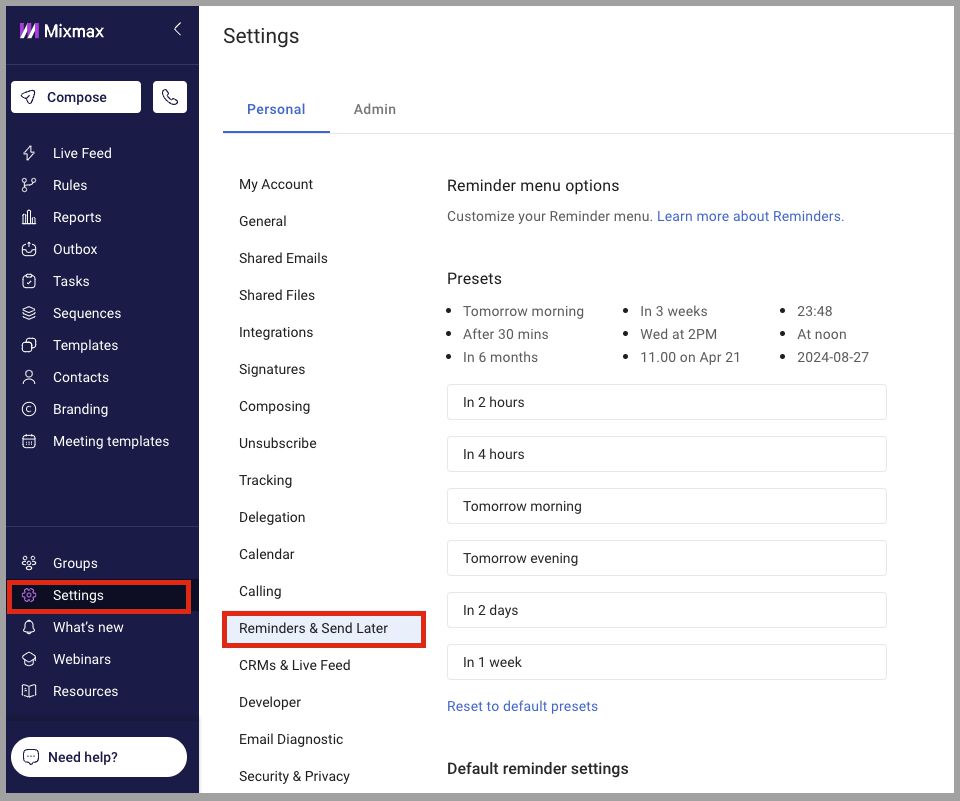
You can customize your Send Later options. To do this:
- Go the Reminders & Send Later section of your Settings.
- Adjust the preset times for when your emails will be sent according to your preferences.
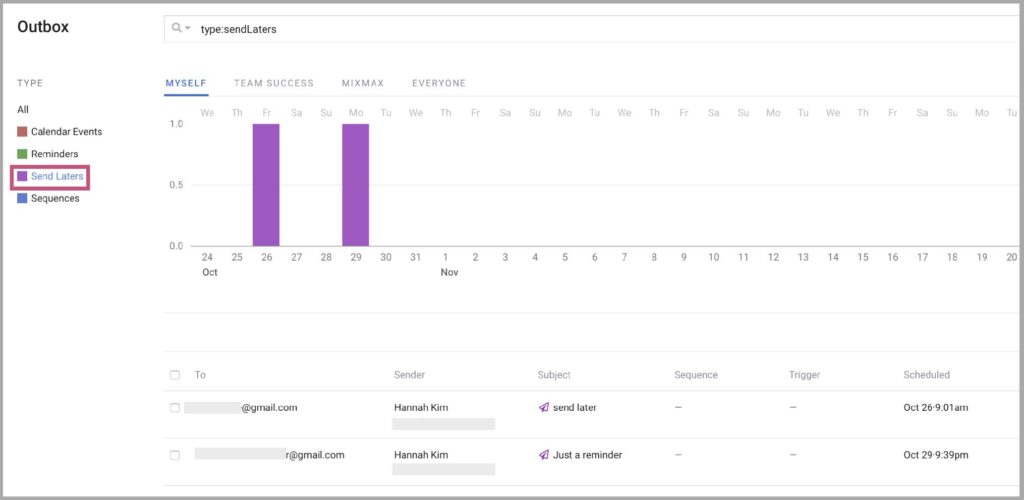
Where to find your scheduled emails
To access your scheduled emails:
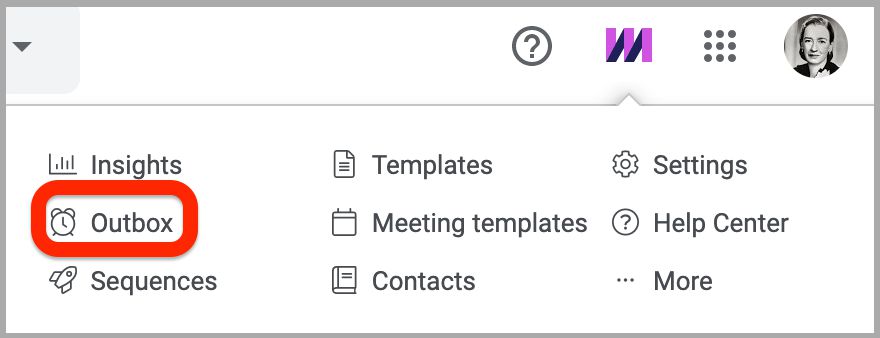
- Hover over the M in the top right corner of Gmail and click on Outbox.
- Or go directly to the Outbox in your Mixmax dashboard.
- In the Outbox, click Send Laters in the left column to view only your scheduled emails.
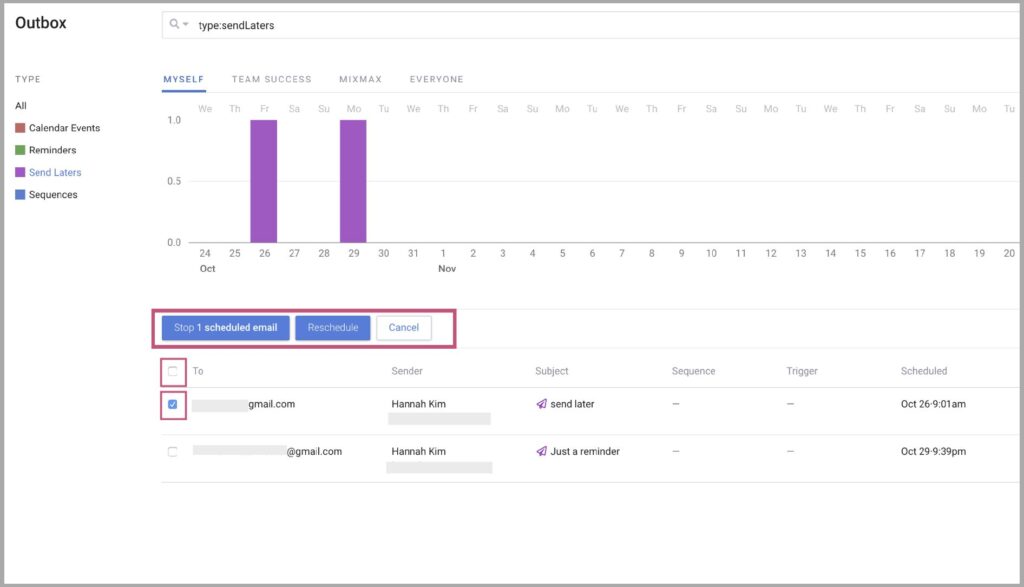
Edit a Scheduled Email
If you want to make changes to a scheduled email:
- Select the checkbox next to it in the Outbox.
- Mixmax will provide options to reschedule or stop the email, moving it to your drafts folder.
7. Set Reminders in Mixmax
You can use reminders to bring an email back to your inbox at a specific date and time if there is no activity recorded, such as if the email is not read. You can:
- Set a Reminder When Sending An Email
- Set a Reminder from Within an Active Email
- Set a Reminder From Your Inbox
- Set a Reminder From Your Reminder Settings
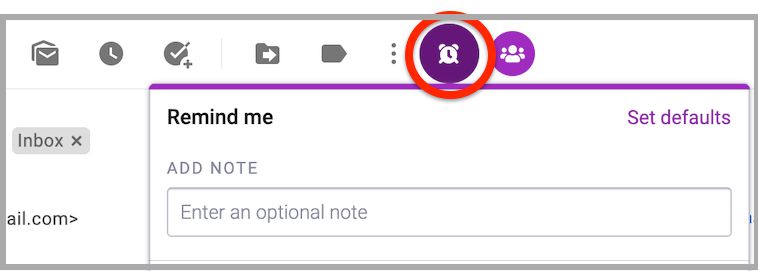
Set a Reminder When Sending An Email
To set a reminder:
- Click or hover over the Remind Me button in the top bar (under the subject line).
- Specify the desired time and trigger for the reminder.
📝 Note: You can choose the conditions for receiving a reminder, such as if the recipient doesn’t reply, if the email remains unopened, or regardless of whether they open or reply.
Set a Reminder from Within an Active Email
- Hover your mouse over the Remind Me button in the top action bar.
Set a Reminder From Your Inbox
- From your inbox or sent folder, hover over the clock icon.

Set a Reminder From Your Reminder Settings
- Reminder and Send Later setting located in your Mixmax dashboard.
8. Share a Template in Mixmax
To share a template, open the template and click on Share.
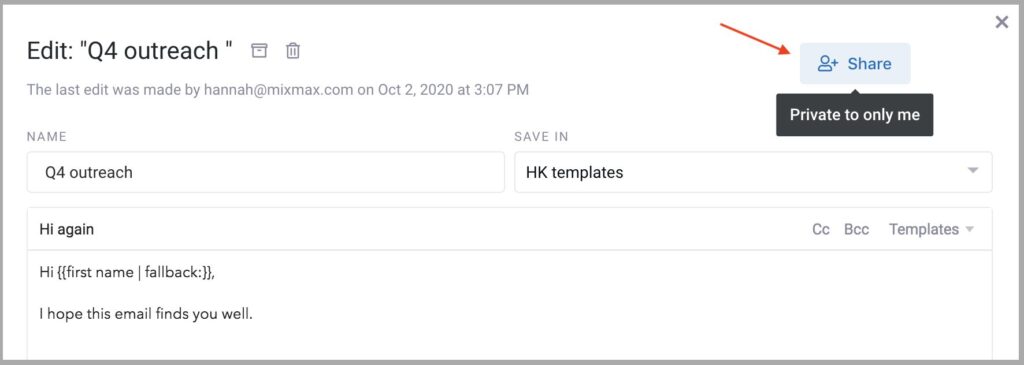
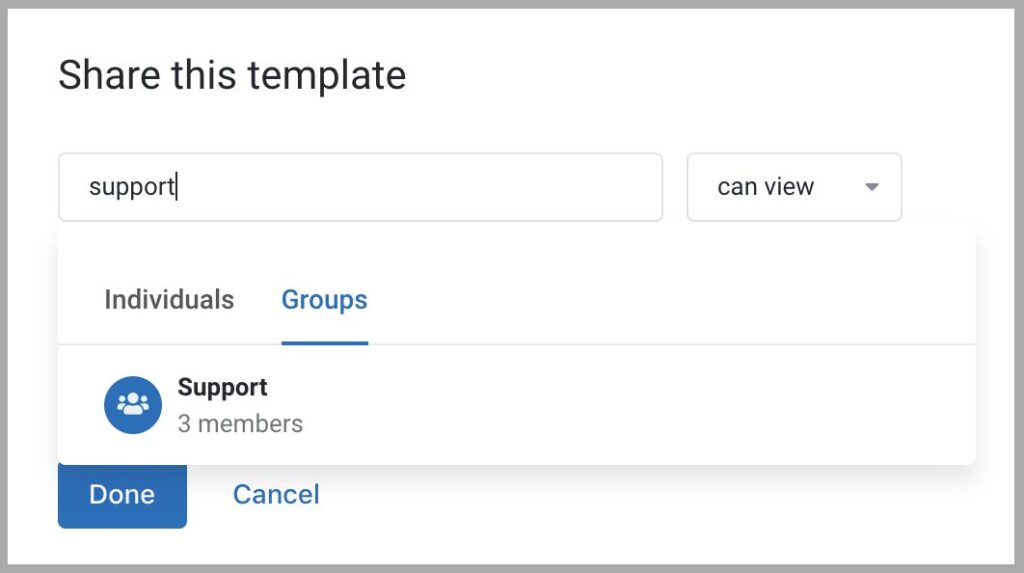
You have the option to share with a Workspace Group or with individuals.
- To share with individuals, add their email address under the Individuals section, using the email associated with their Mixmax account.
- Alternatively, you can share with a Group by typing its name in the Groups section.
Alternatively, you can share with a Group by typing its name in the Groups section.
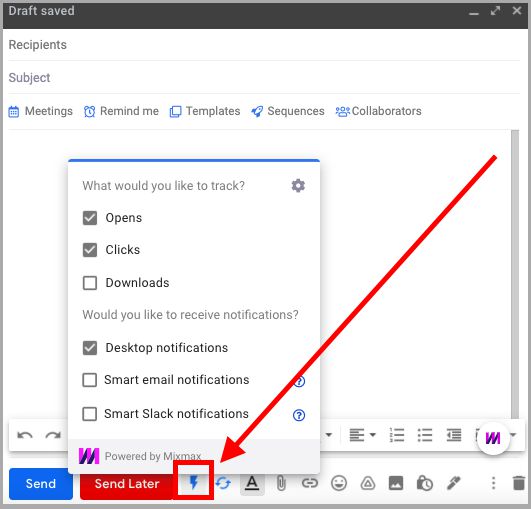
9. Turn Tracking On or Off For Individual Messages in Mixmax
You have the flexibility to choose the tracking options for each email individually.
In the Compose window, simply hover over the Track button (lightning symbol) on the bottombar.
You can enable or disable tracking for opens, clicks, and downloads by checking or unchecking the corresponding checkboxes.
You can also toggle desktop notifications on or off for this specific email using the same method.