Seismic Introduction Training Content Template
Introduce your sales reps to the basics of Seismic with this Seismic Introduction Training. Reinforce when and where needed to maximize rep productivity.
1. How to Access Workspace Content in Seismic
To prepare for a client meeting, access Workspace content from:
- Web Browser
- CRM
- Mobile Device
To set up easy access to your content, start from the Content Profile page:
1) Select the content title

2) Click the “… icon” (ellipsis) and select the “Add to Cart” option to queue up the content you want to share in the meeting
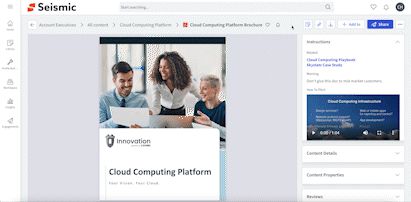

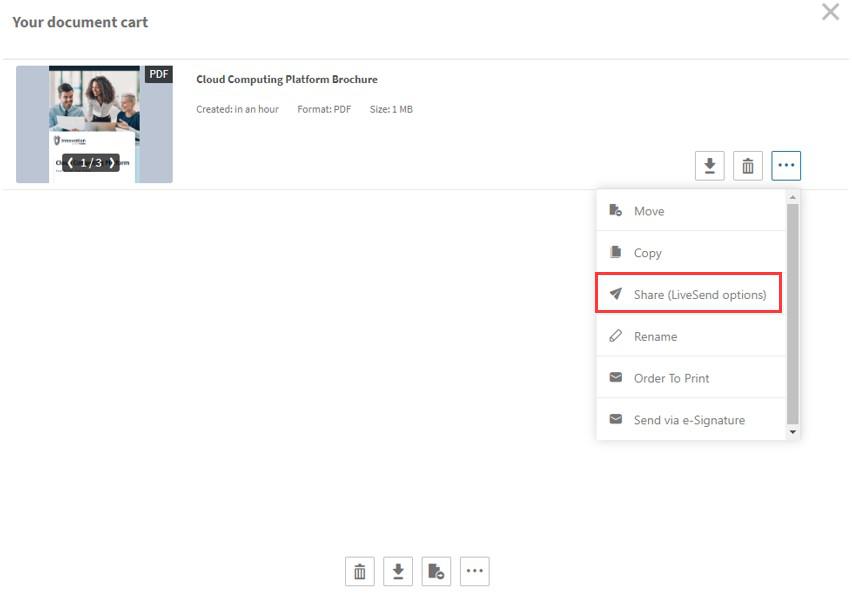
3) In the Document Cart, choose to share the content before or after the meeting
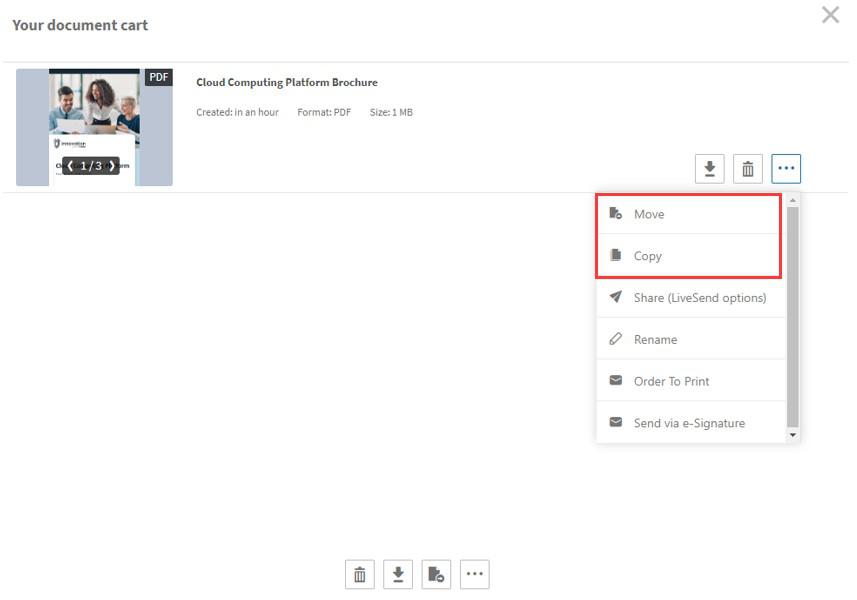
4) Move or copy content to your Workspace
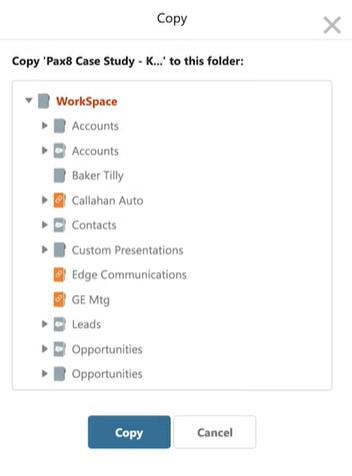
5) Pick a location to place the item
6) You can also move all docs at once by selecting the “move all icon”
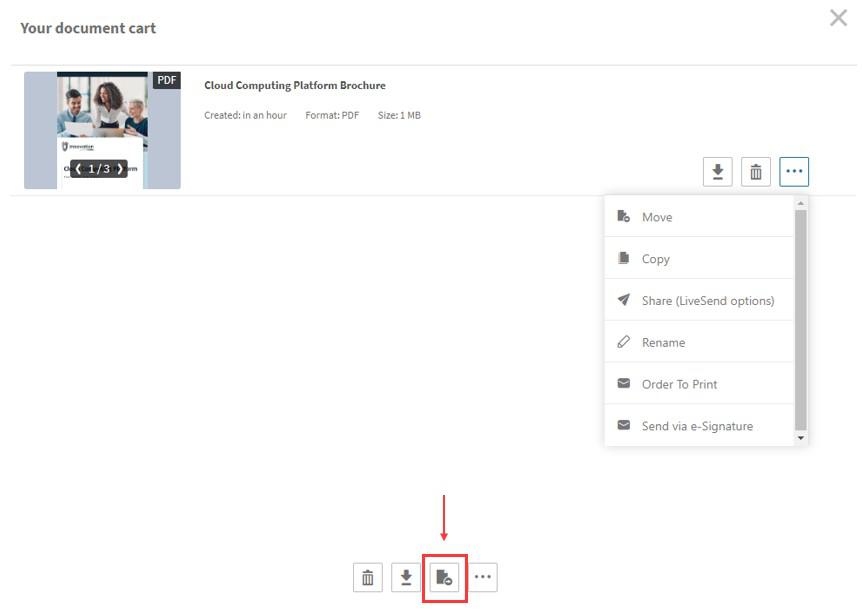
☆ Note: Moving docs removes them from your document cart
2. Add Content to Workspace in Seismic
From the Search Results page, add content by clicking the “…” icon (ellipses) and select “Add to Cart” or “Add to WorkSpace”
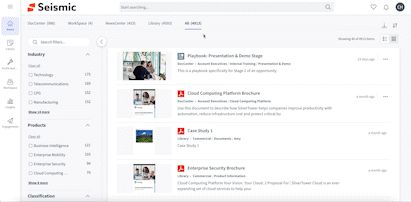

🔍 To learn more, search for “How to Access WorkSpace Content” in the Wiki
From the Content Profile page, add content by clicking “+ Add to”

To add content from outside Seismic, click “+ New” and choose to add content from a URL or from a file or folder from your local drive
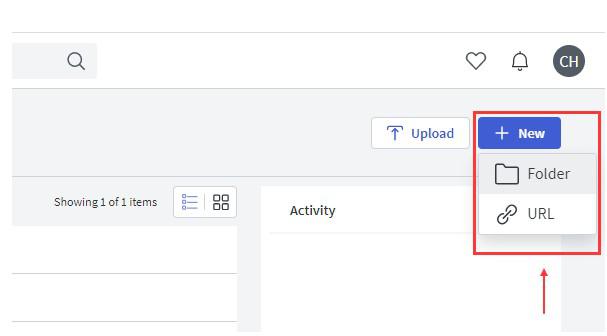
✅ Best Practice: Use the “My Files” personal drive as a staging area before moving the prepared content into folders for meetings
☆ Note: Content will then be stored in the My Files tab in your Workspace where it will be visible to only you
3. How to Collaborate in WorkSpace with Seismic
To invite peers to collaborate on content, click the “… icon” (ellipsis) and select “Invite others”
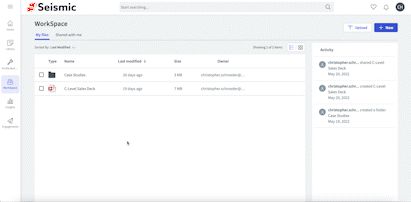

✅ Best Practice: Collaborate on content when you need to align on sales strategy or messaging
To view details of account opportunities and see which team members are collaborating with you, click the “From CRM” tab

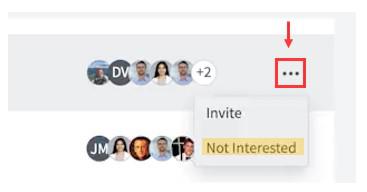
To no longer see an opportunity, click the “… icon” (ellipses) and select “Not interested”
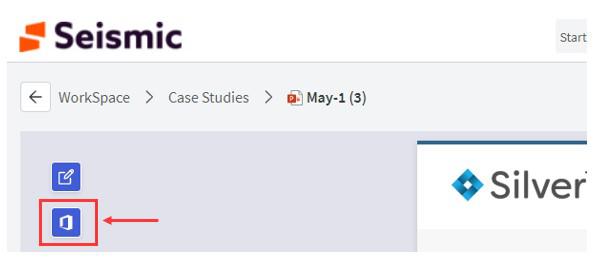
Select the “edit” icon when viewing a specific content profile to customize the content using PowerPoint Online
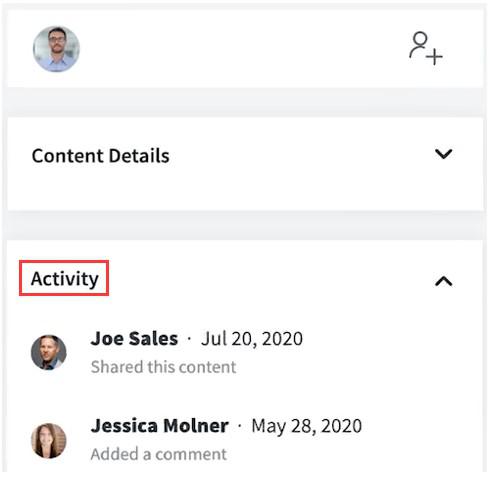
After the content has been updated, Seismic automatically creates a new revision in WorkSpace for version control underneath “Activity”
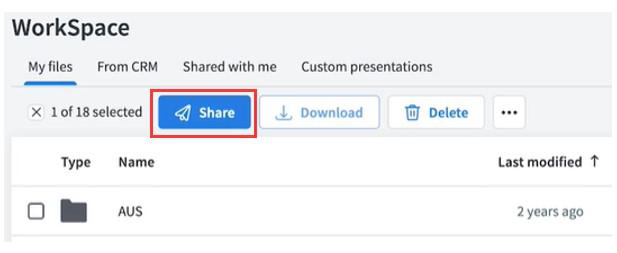
Deliver content directly from Workspace by selecting the “Share” icon
4. How to Send Content via a LiveSend Email in Seismic
Use LiveSend to share content with buyers by sending links that capture buyer engagement activity and report on it
Choose to send a LiveSend link through either an Email or a shareable link
Send Content via a LiveSend Email
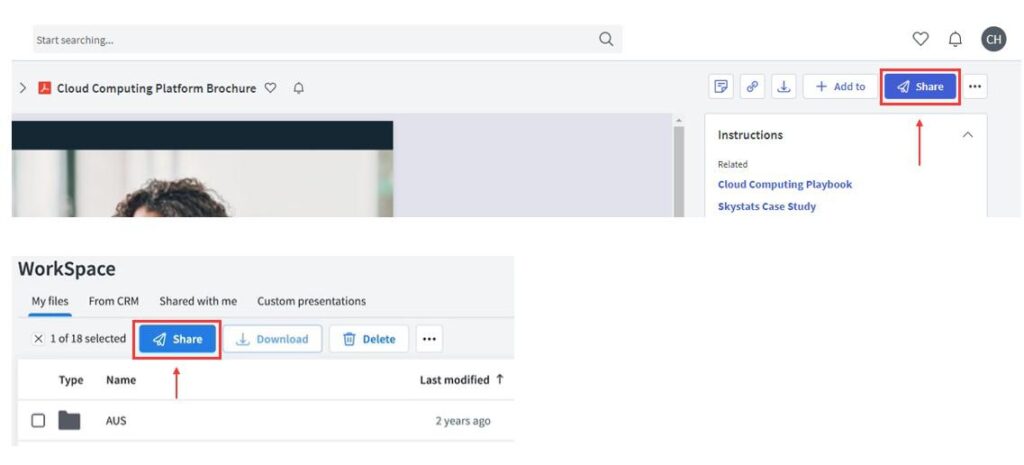
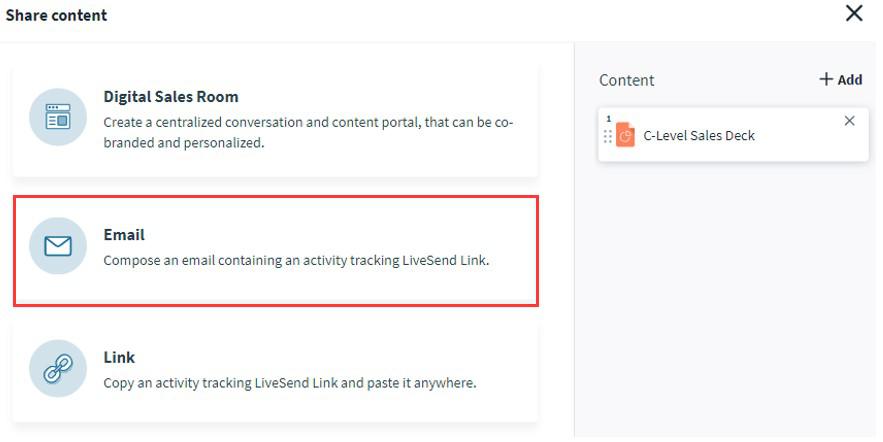
2) When the prompt box pops up, select the option to send an email with a LiveSend link directly from Seismic
3) Add recipients using their email or name and choose to send either separately or to a group
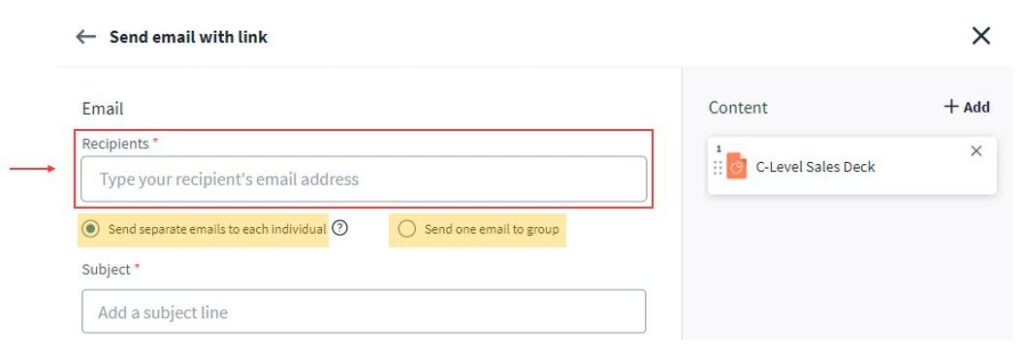
Best Practice: Using the “Send email with link” option maximizes analytics data, allowing you to see what content was viewed and for how long
🔍 To learn more, search for “Separate Emails vs. Group Emails” in the Wiki
4) Click “+Add” to include additional content
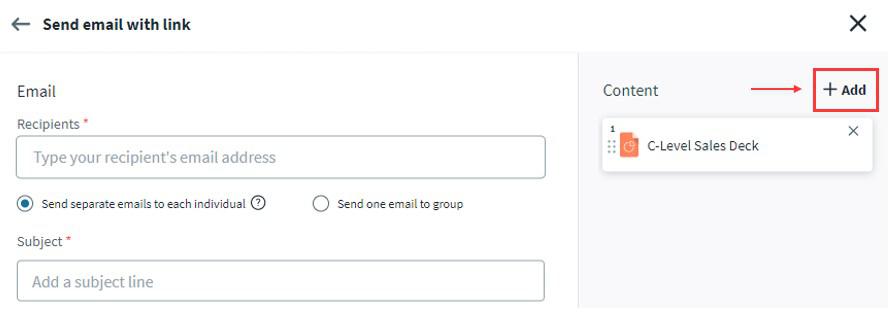
5) Choose to add content from Recents, Favorites, DocCenter, or WorkSpace and click “Add”
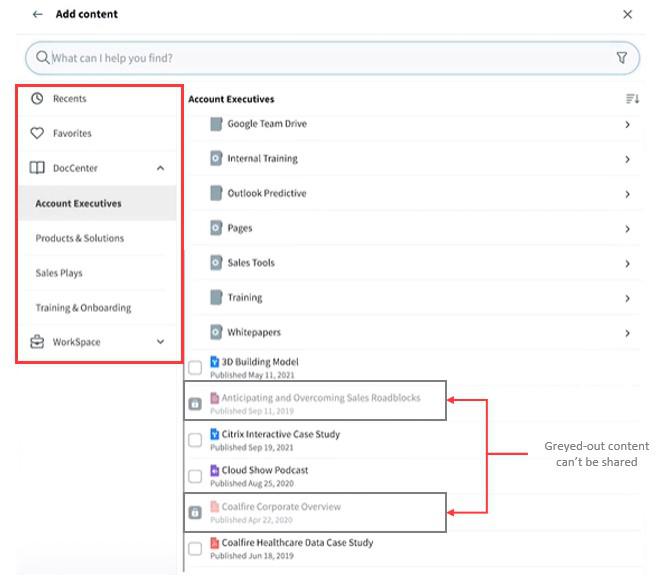
☆ Note: Greyed-out content can’t be shared via LiveSend
6) When email is ready to be sent out, choose to edit the Link Settings and Link Text, and click “Send” to share
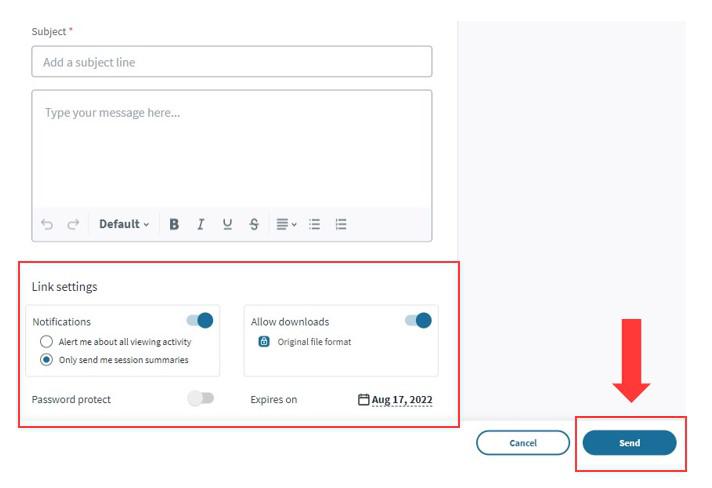
🔍 To learn more about LiveSend, search for “LiveSend Link Settings” or “How to Send Content via a Shareable Link” in the Wiki
5. How to Send Content via a Shareable Link with Seismic
Use LiveSend to share content with buyers by sending links that capture buyer engagement activity and report on it
Choose to send a LiveSend link through either an Email or a shareable link
How to Send content via a shareable LiveSend link
1) After the prompt box pops up, select the option to copy a shareable link to share content from your own email application or social media platform
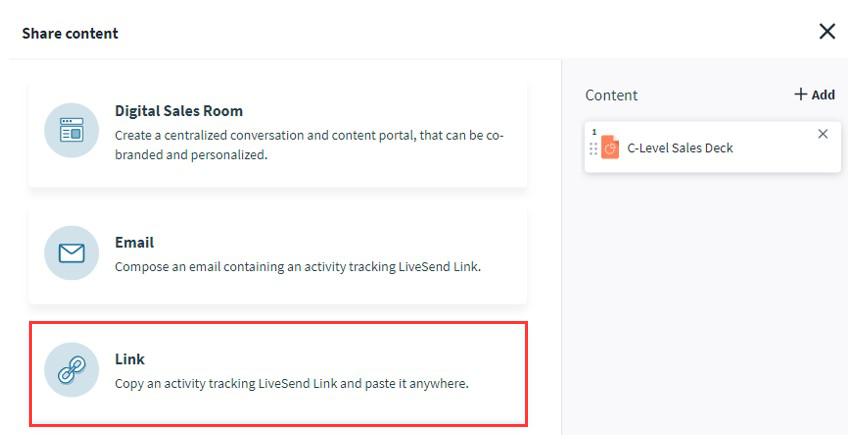
2) Add recipients using their email, choose to edit the link Link Settings and Link Text, and click “Create Link” to share
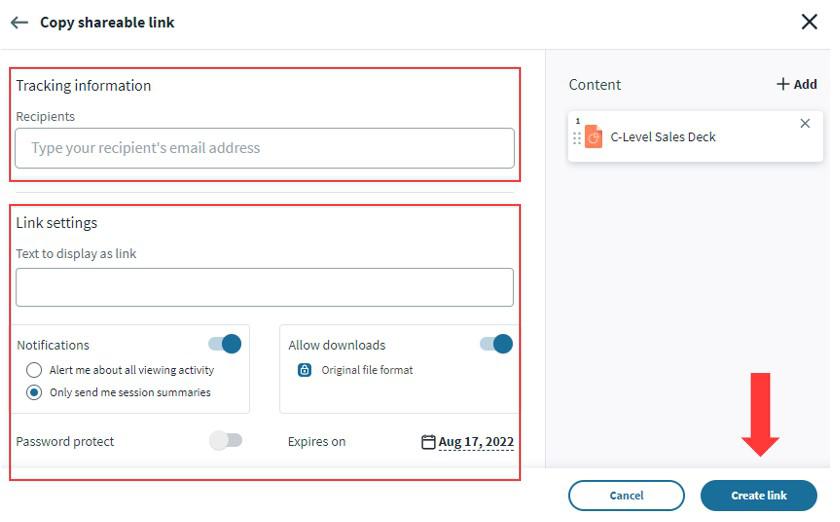
To learn more about LiveSend, search for “LiveSend Link Settings” or “How to Send Content via a LiveSend Email” in the Wiki
6. Separate Emails vs. Group Emails in Seismic
When sending separate emails, remember…
- All recipients are visible in the email
- Usage Summary reports only reflect the whole group’s viewing, so you won’t know which individual user viewed the content
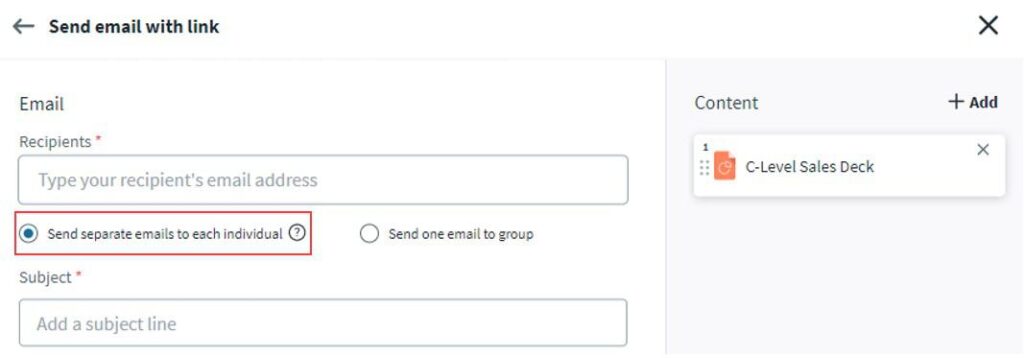
Best Practice: Sending separate emails gives you better content engagement metrics
When sending one email to a group, remember…
- Separate emails are sent to each individual
- Usage Summary reports are generated for each recipient, so you will know individual user content engagement metrics
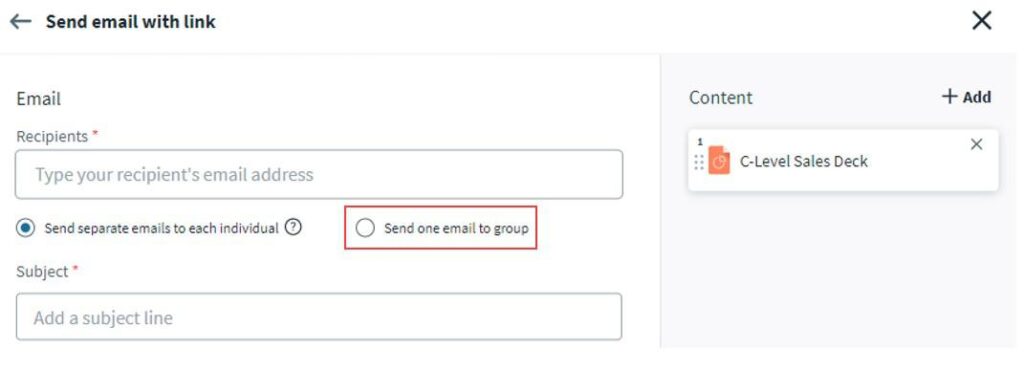
🔍 To learn more about Usage Summary reports, search for “Engagement Center” in the Wiki
7. LiveSend Link Settings in Seismic
When downloading content, remember…
- Seismic can only track viewing sessions when content is viewed in the browser
- Engagement metrics can’t be tracked if a recipient downloads the content

Best Practice: The default option is to not allow downloads
When using a password, remember…
- If you’re sending sensitive information, create a password that you can send to the recipient in a separate email or other communication channel
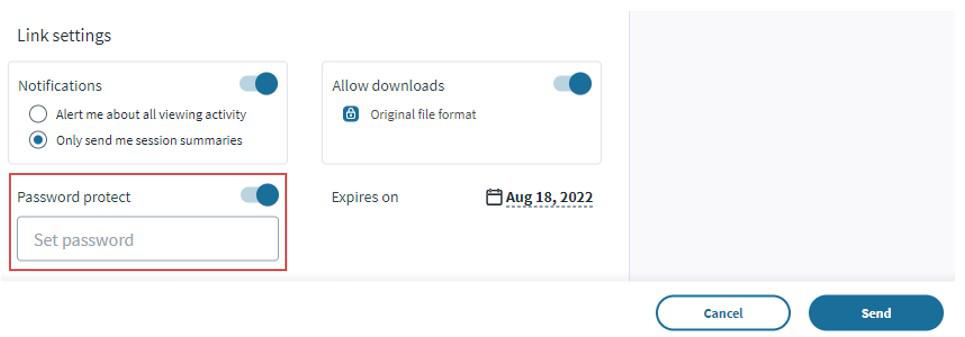
When setting an expiration date, remember…
- Keep the default date or change the expiration date
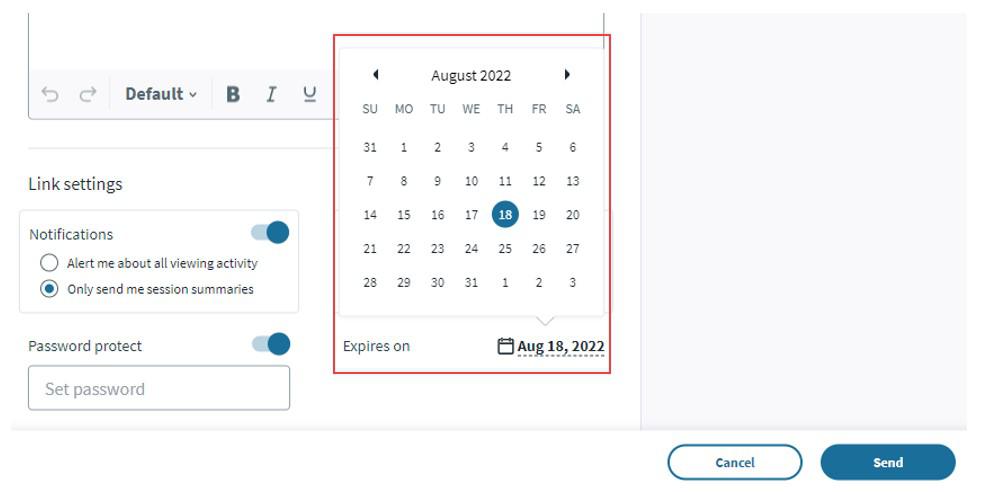
Best Practice: When sending a proposal, make sure to set an expiration date for which it is valid
When setting notification preferences, remember…
- “Only send me session summaries” option will notify you via email each time the recipient views the content
- Summaries provide data on when content is viewed and for how long
- “Alert me about all viewing activity” option will notify you via email as soon as the recipient opens the link

8. How to Use Seismic's Email Integrations
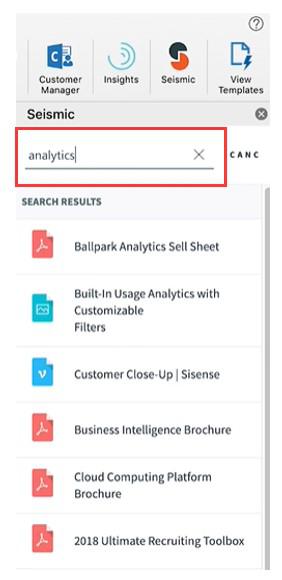
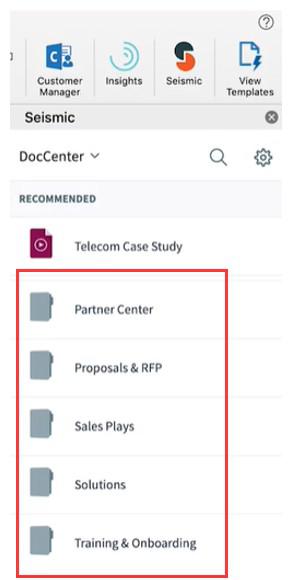
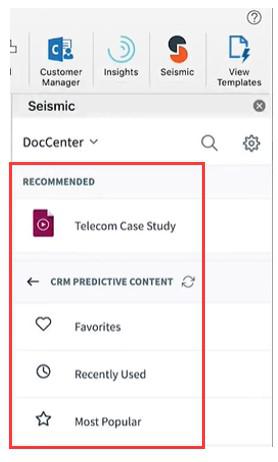
Seismic’s email integrations enable you to find, search, and share content by providing:
Keyword searches for content by using the search bar
Folder navigation
Recommended content based on Seismic’s Predictive Content engine
☆ Note: Seismic’s main email integrations are with Microsoft Outlook and Google’s Gmail
EXAMPLE: adding Seismic content when writing an email
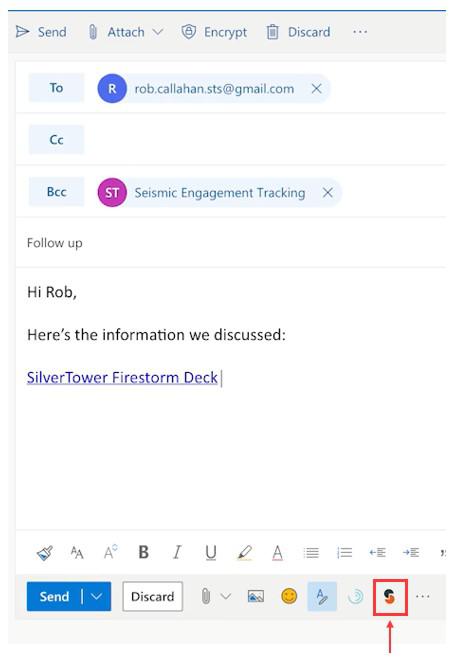
1) Locate and select the “Seismic Icon” to open up the panel for Seismic content on the side of the window
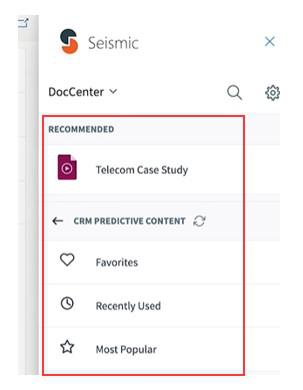
2) Find Seismic content by selecting:
- Recommended content
- Favorite content
- Most popular
- Recently used
- Content from WorkSpace or a Content Profile
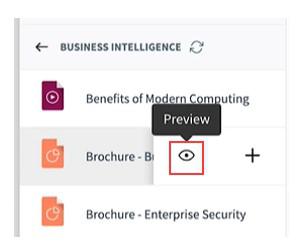
3) Click the “eye icon” next to the content title to see a content preview
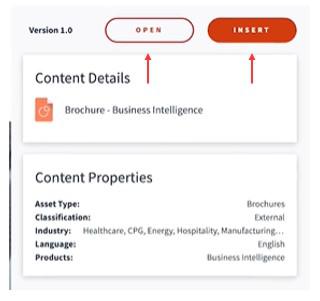
4) Select “Open” to view the content or “Insert” to add the Seismic content
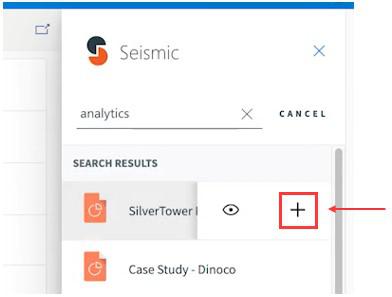
5) Insert Seismic content directly into the email using LiveSend links by clicking “+” icon
🔍 To learn more, search for “How to use LiveSend using Seismic’s Email Integrations”
9. Using LiveSend with Seismics Email Integrations
Share Seismic content using LiveSend links to track engagement metrics by:
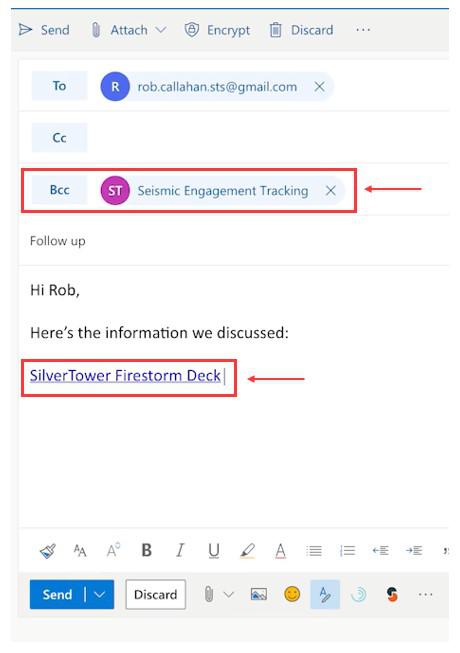
1) Select the “+” icon to insert a LiveSend link into the email

2) The content link and a “Seismic Engagement Tracking” recipient will be added in the Bcc field to ensure proper tracking
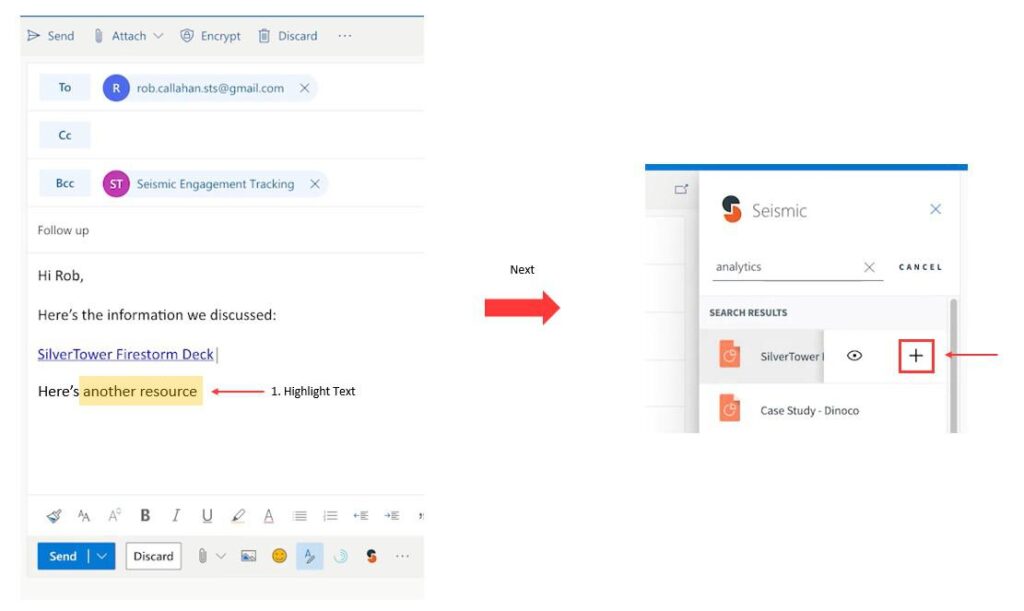
3) Customize the LiveSend link text by highlighting the text before you hit the “+” button
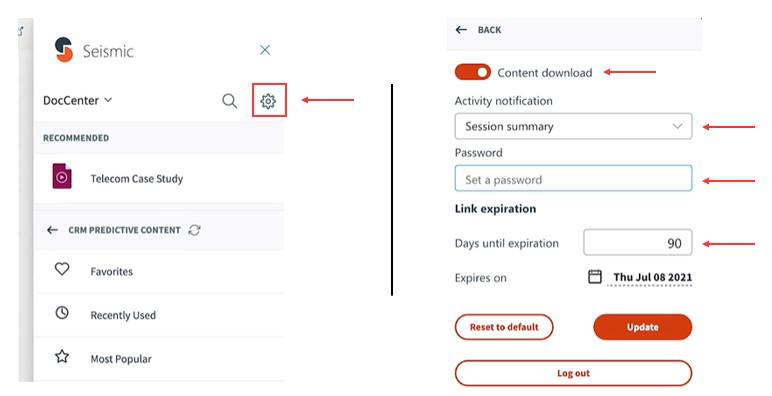
4) Configure LiveSend options by clicking the “gear” icon to:
- Control a recipient’s ability to download the content
- Receive notifications when recipient has engaged with the content
- Set an expiration date
- Set a password
☆ Note: Seismic cannot track engagement metrics for content downloaded by the recipient
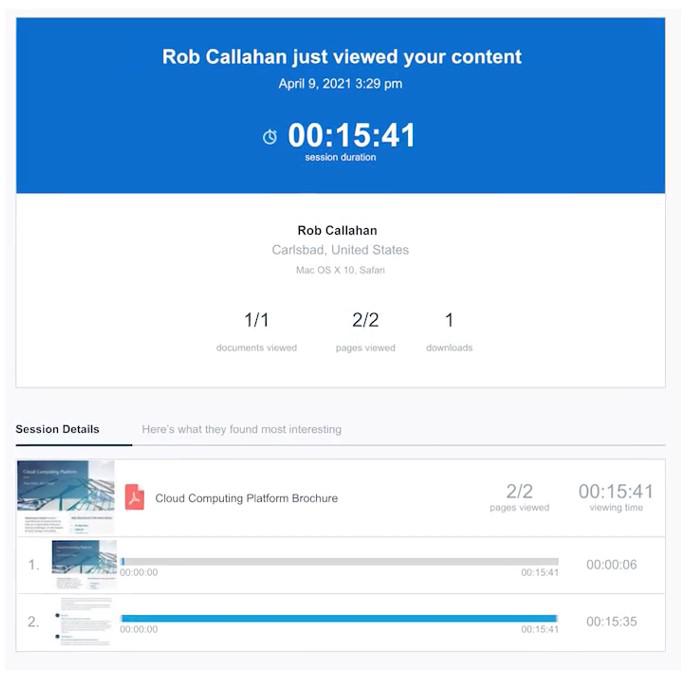
5) Receive a Content Usage Report after a recipient views the content to see a breakdown of how the recipient interacted with the content
🔍 To learn more, search for “Engagement Center” in the Wiki
10. Leveraging Engagement Center in Seismic
The Engagement Center provides you a centralized hub to manage and track recipient engagement with the Seismic content you’ve shared via LiveSend
To access your LiveSend analytics
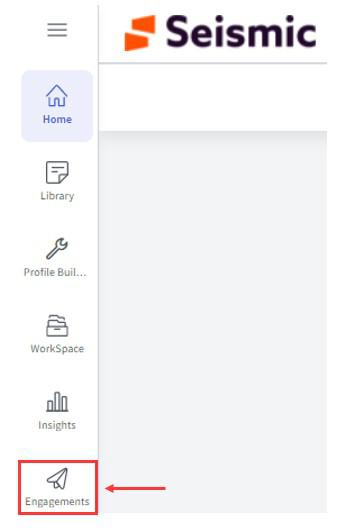
1) Select “Engagement Center” from the main navigation menu
2) See the full activity feed of all the LiveSend links you’ve shared in the Engagement Center dashboard
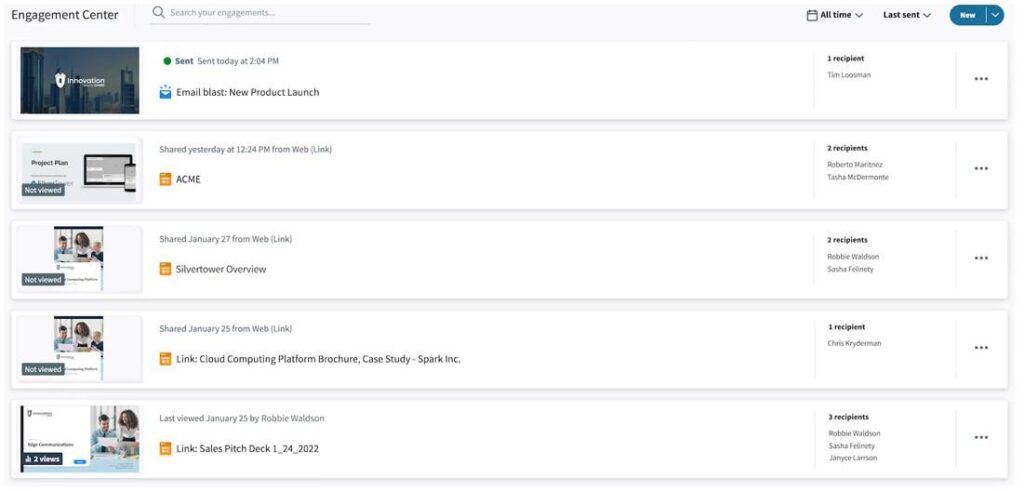
3) Each “card” represents a shared LiveSend link and includes:
- A preview of the content
- Link content title
- List of recipients
- Link Details

4) Click the “arrow icon” to view:
- Most recent content engagement activity
- A preview of the email sent
- A “See analytics” link to view a more detailed report on a recipient’s content interactions

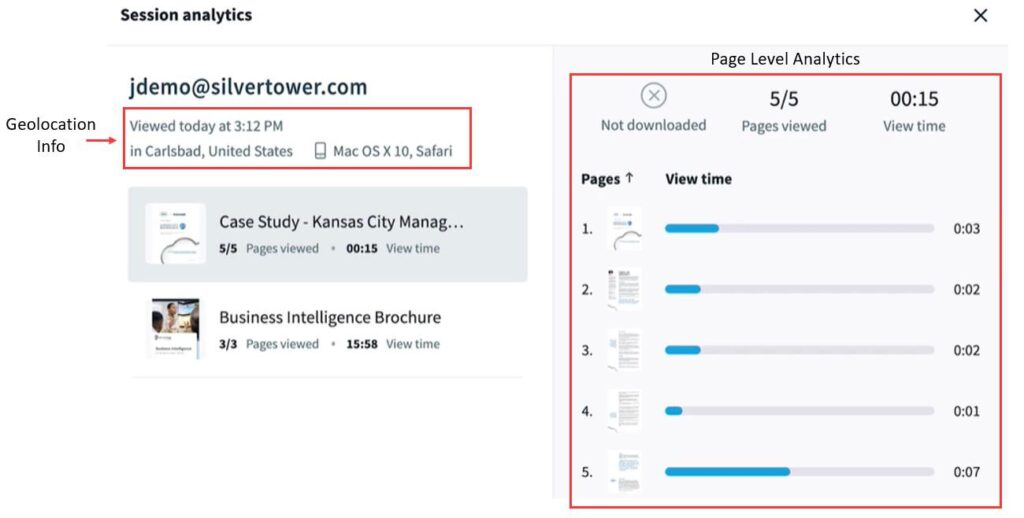
5) Click the “See analytics” link to pull up the page level analytics
🔍 To learn more, search for “Managing LiveSends” in the Wiki
☆ Note: If “geotag” is turned on, you’ll be able to see the location of where the content was viewed and the device that was used to view it
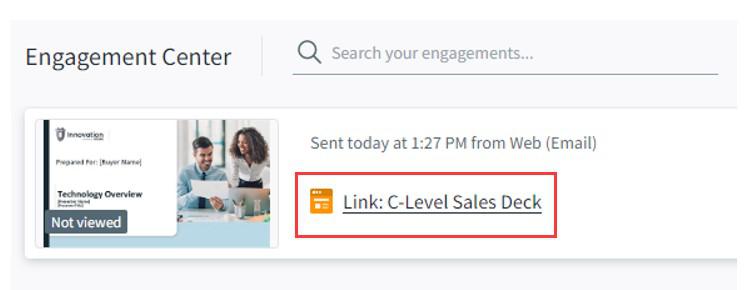
6) Click the “Link Title” to:
- Edit content
- Change link settings
- View content engagement data
🔍 To learn more about controlling the link, search for “Managing LiveSends” in the Wiki
11. Manaing LiveSends using Engagement Center
Use the Engagement Center to:
- Manage LiveSend links
- Add or remove content
- Access link settings
- Remove access
Click the “Link Title” or the “Link Details” icon to begin

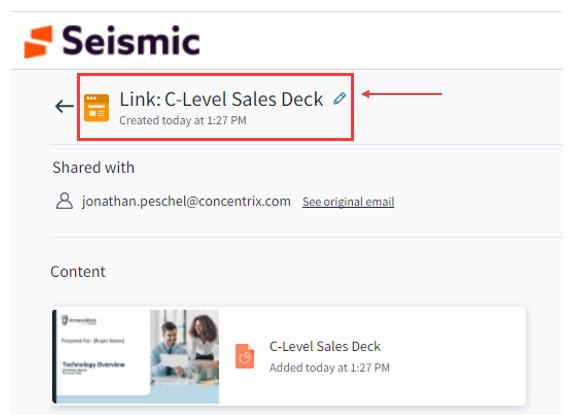
Manage LiveSend Links:
Change the title of the link by clicking the “pencil” icon
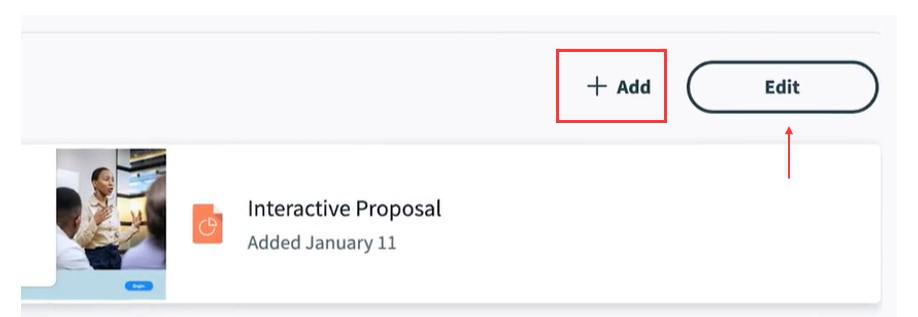
Add or remove content:
Click “+ Add” to add or remove content or click “Edit” to drag and reorder content
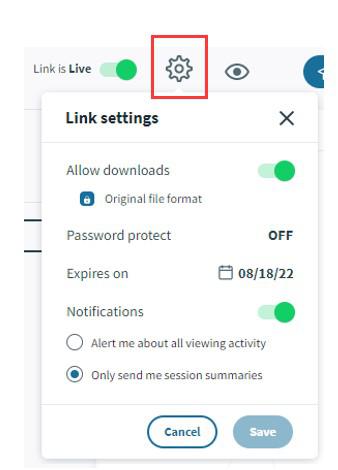
Access Link Settings:
Click the “gear” icon to change the LiveSend link settings
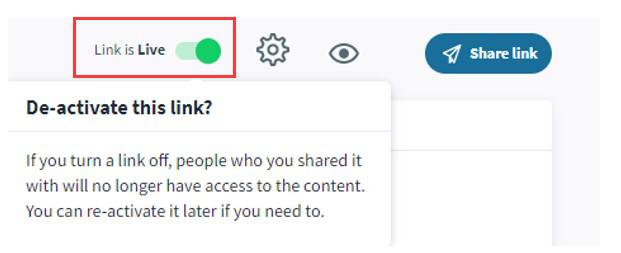
Remove Access:
Toggle the switch to keep the link live or deactivate it
12. How to Customize with FreeStyle in Seismic
Freestyle enables you to build and personalize custom decks, pitches, and presentations for upcoming customer engagements
Start from the content profile page to begin customizing content by:
1) Click the “Customize” icon
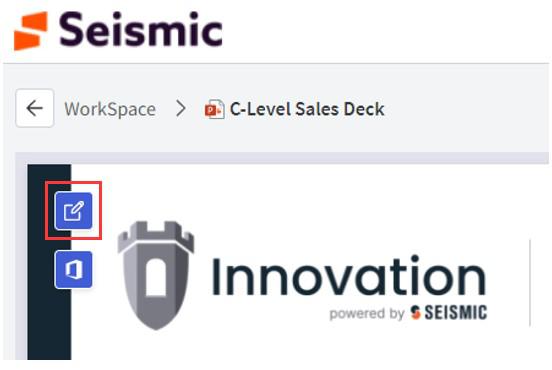
2) Click the “+ Add Slides” button in the top left corner to add slides from the library or desktop
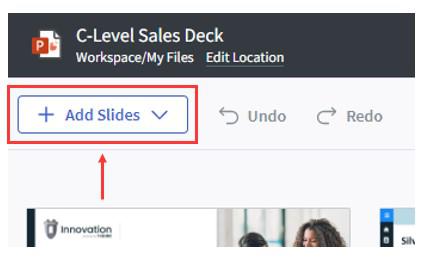
3) Use the filters to narrow down the results

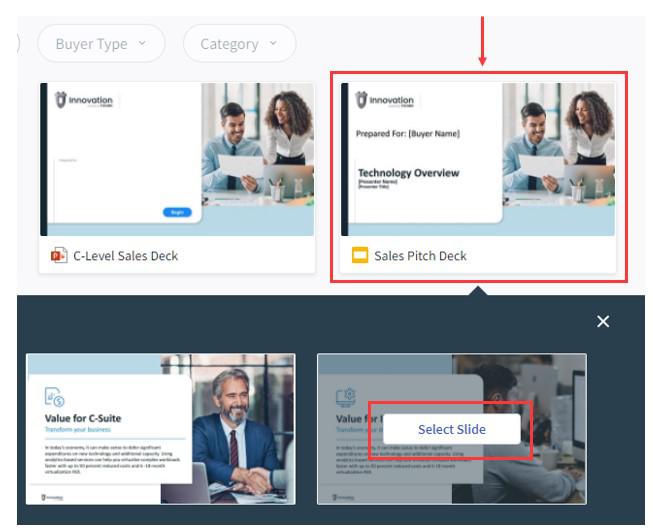
4) Click the presentation that you want to pull slides from and click “Select Slide” on each slide you want to add to your deck
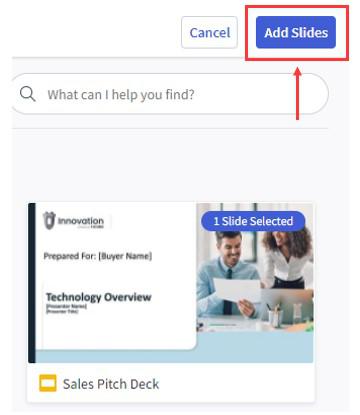
5) Click “Add Slides” in the top right corner
6) Drag slides to rearrange them into the order you want
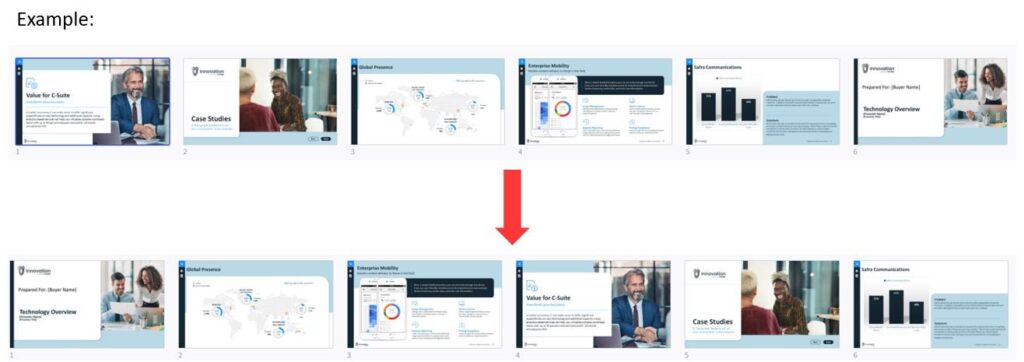
7) Click “Close” in the top right corner to exit out of the Freestyle editor
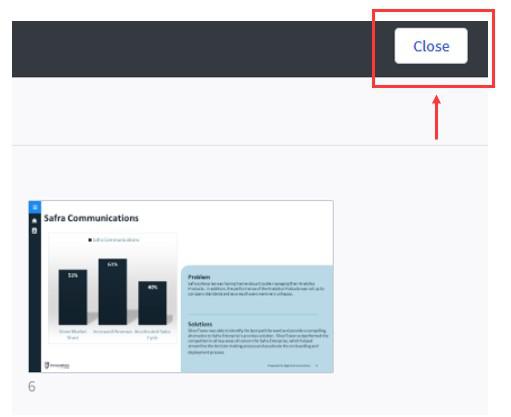
☆ Note: the updated deck will be saved to your Workspace for your upcoming meeting
8) Choose to share your custom deck via LiveSend by clicking the icon

13. Manage a Digital Sales Room in Seismic
Create a Digital Sales room to share content and collaborate with buyers from a central location and capture engagement insights throughout the sales cycle
To build a Digital Sales Room, start by:
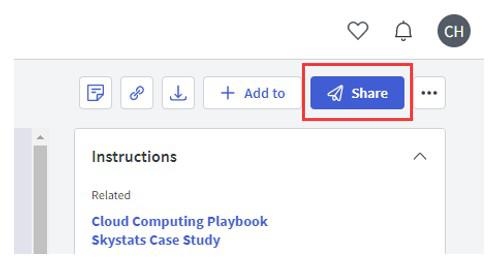
1) Select a content item and click the “Share” button
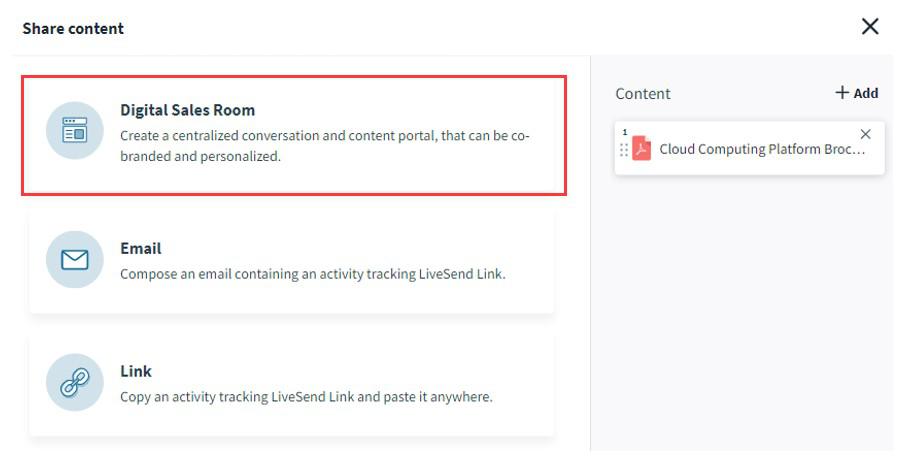
2) Select “Digital Sales Room”
3) Setup the Digital Sales Room to:
- Create a Name
- Add a Logo
- Include additional content
- Add a Header Image
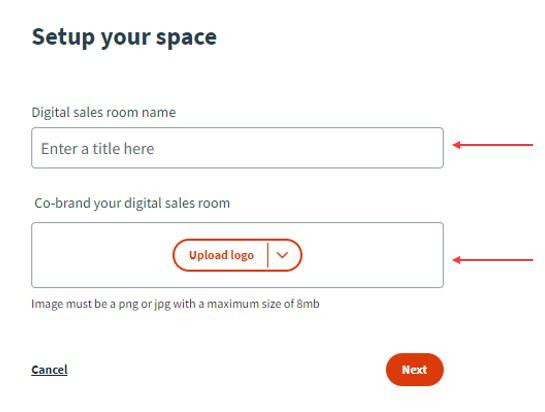
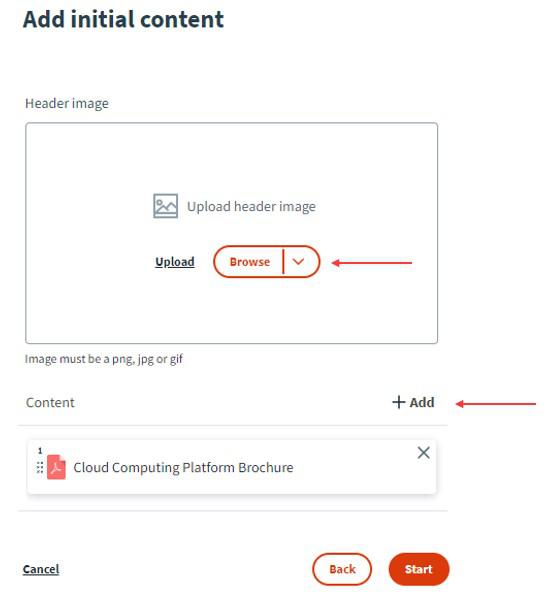
☆ Note: Select the “Skip to editor” link on the left-hand side if desired
4) When in the Digital Sales Room editor, customize the page:
- Add a logo
- Add a title
- Include additional Seismic content from Recents, Favorites, DocCenter, or Workspace

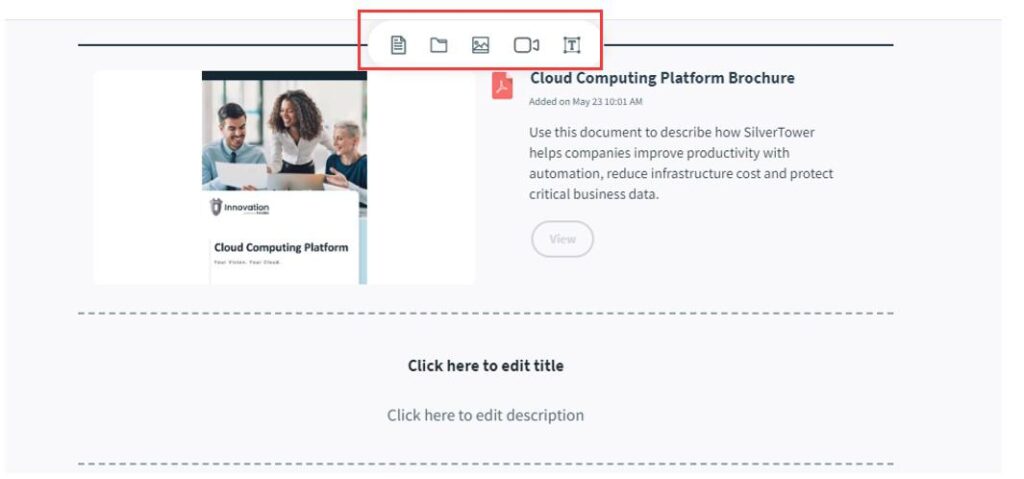
5) Select the “Text icon” in the top right corner to add a Title and/or Description by dragging the widget to the content list

✅ Best Practice: Adding a Title and Description to introduce the content enables your buyer to clearly understand what is being presented
6) Use the “Widget Menu” to customize the page and add:
- Documents
- Folders
- Header images
- Video recordings
- Text blocks
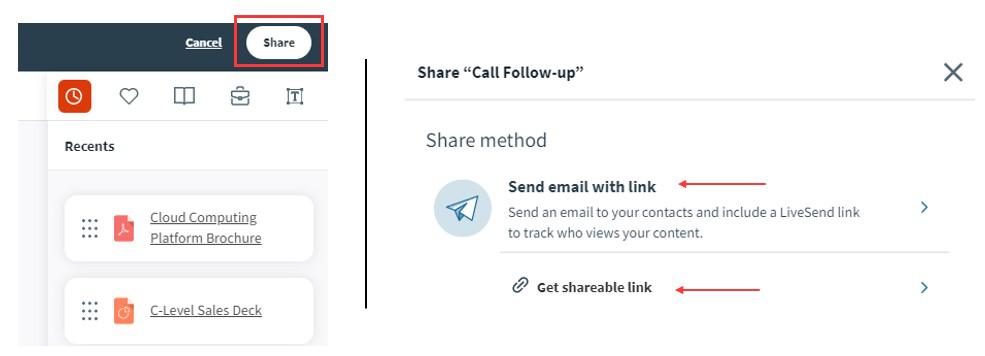
7) When finished, click “Share” and choose to send an email with the Digital Sales Room link or get a shareable link
14. Manage a Digital Sales Room in Seismic
Manage the Digital Sales Room to have better conversations with buyers
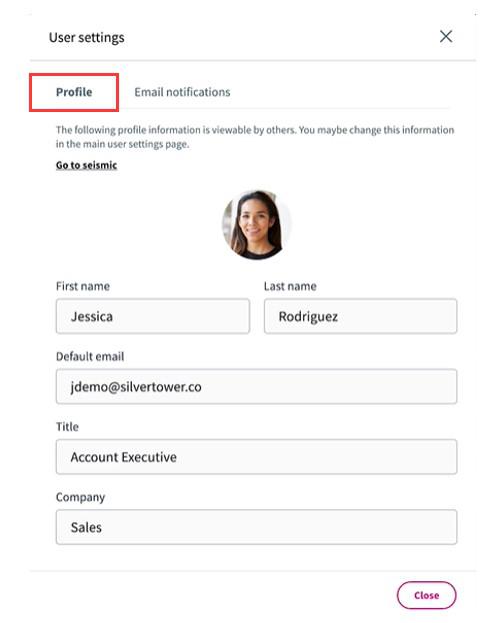
User Settings: Configure how your profile is seen by the recipient by clicking your profile picture in the top right corner
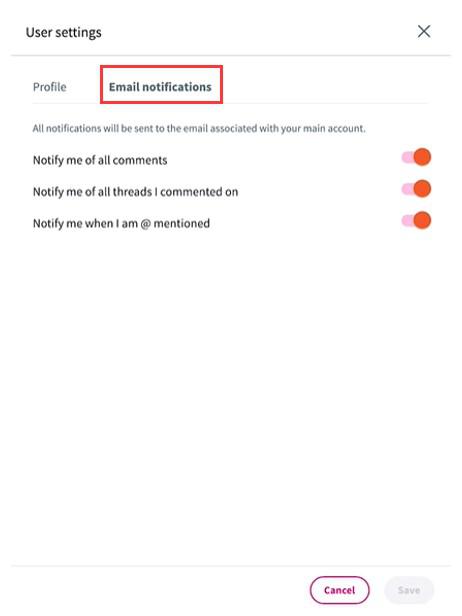
Email Notifications: Keep up-to-date on the conversations at the level you prefer
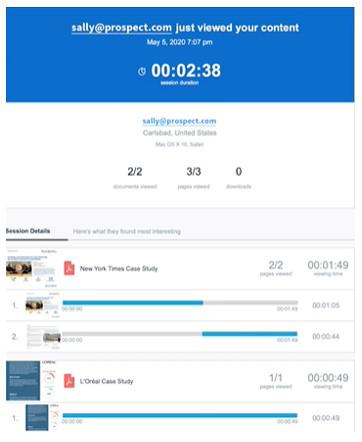
Email Reports: Receive engagement metrics on how viewers interacted with the content
Access Digital Sales Room Engagement Analytics: Manage and track recipient engagement with the Seismic content you’ve shared via LiveSend

🔍 To learn more, search for “Engagement Center” or “LiveSend” in the Wiki
15. How Seismic works with Salesforce
Seismic enables you to choose, personalize, and prepare content within Salesforce. The Predictive Content engine gives you recommendations to help you decide which content to use and when to use it during the sales cycle
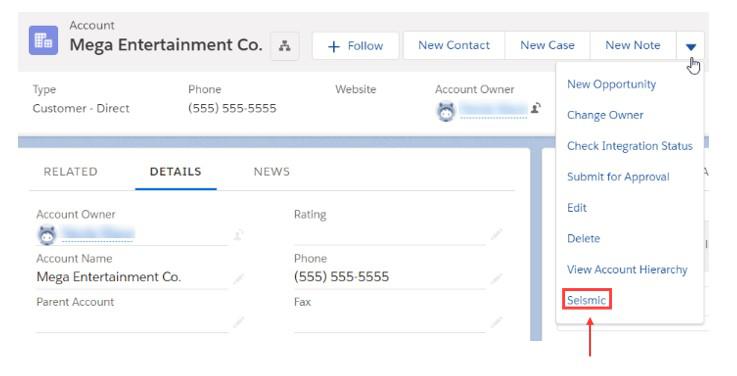
Access Seismic by clicking the “Seismic Apps” tab while in Salesforce
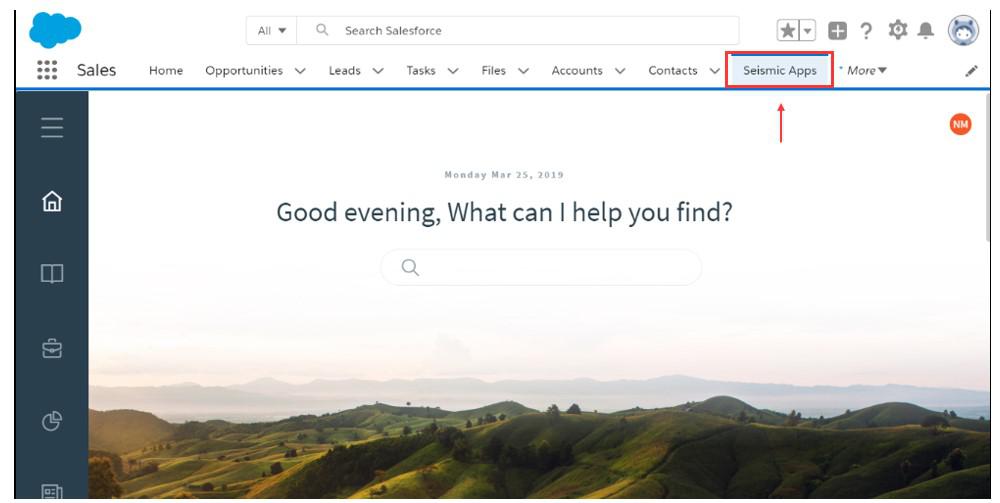
Access Seismic by using the quick-action shortcut in Salesforce
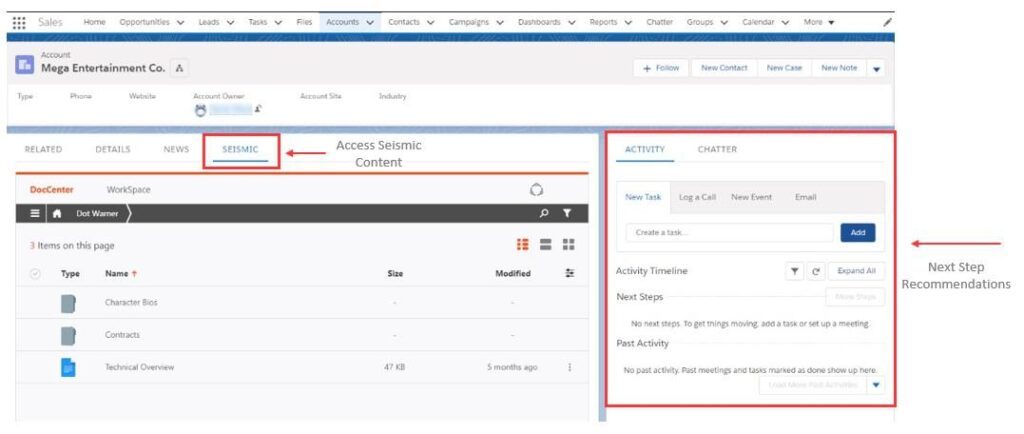
Search for content by clicking the “Seismic” tab
See recommended next steps in the “Activity” tab in the panel on the right
🔍 To learn more, search for “Predictive Content” in the Wiki
16. What is Predictive Content?
Seismic uses data to surface the most relevant content and gives recommendations on next steps for your customers at the right altitude and for the right situation to enable you to make informed decisions and find assets fast.
Predictive Content and Salesforce Use CaseSeismic’s predictive content is embedded on the Opportunity in Salesforce to surface content that targets the specific sales stage the opportunity is currently in. The content will dynamically change as your opportunity progresses through each sales stage.
Search for content by clicking the “Seismic” tab
See recommended next steps in the “Activity” tab in the panel on the right

17. Concentrix Catalyst & DigitalSelling

To learn more, visit https://catalyst.concentrix.com/digital selling
Spekit / Seismic Content Pack created by Concentrix Catalyst

